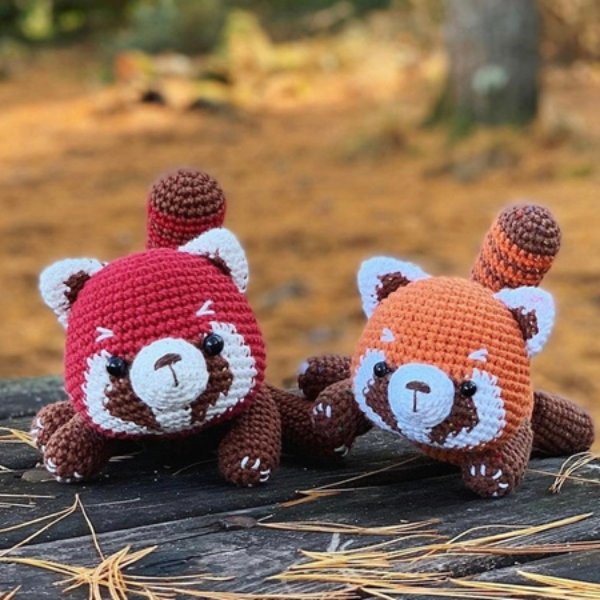
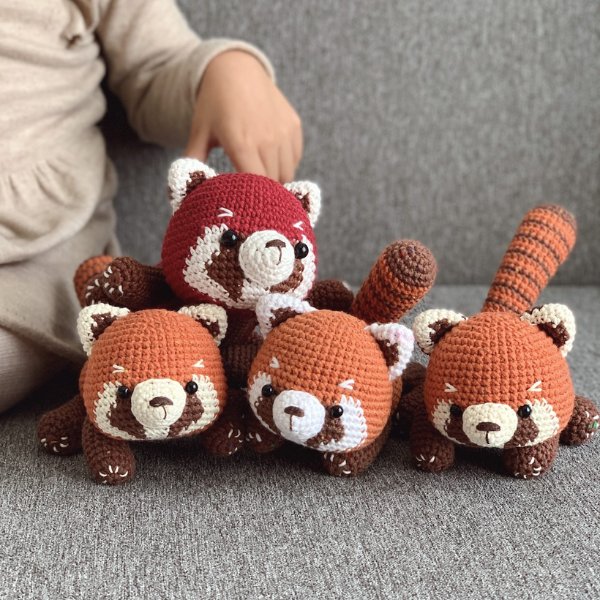
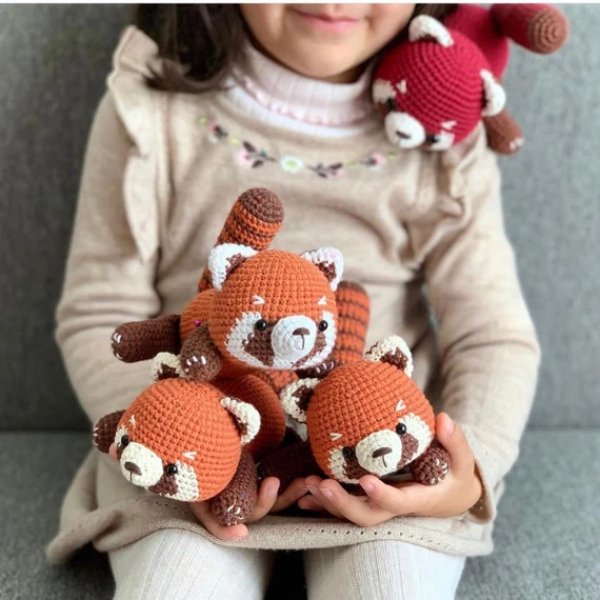
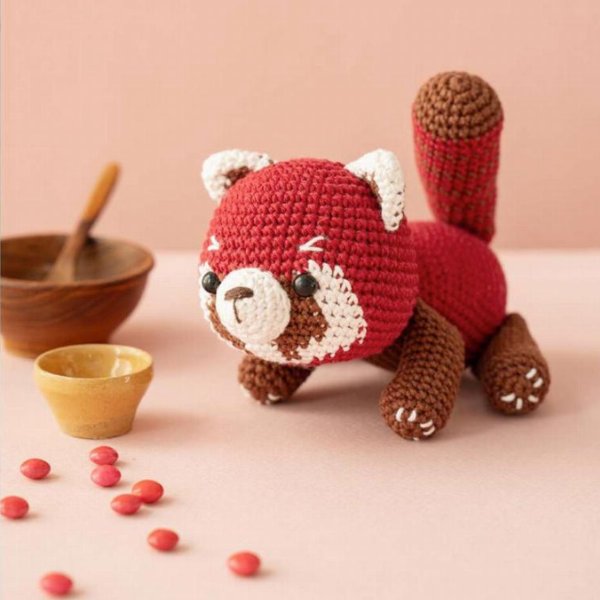
Zada The Red Panda Book Crochet Pattern features a funny and adorable panda bear in red and brown colors. With this Crochet, you can use it to make keychains, bedroom decorations or a gift for friends and relatives. Join Fanycrafts to discover instructions on how to create Zada The Red Panda Book Crochet Pattern.
Zada The Red Panda Book Crochet Pattern

Thank you for purchasing my pattern. Please do not hesitate to contact me if you are confused by any Instructions. This is an original design by Fanycrafts. The pattern is for personal use only. The pattern (or parts of it) may not be reproduced, distributed or resold, translated, published, altered, shared or posted (for sale or free) over the internet or offline!
You can sell the finished products made from this pattem, provided that they are handmade by yourself in a limited number and please give credit to Fanycrafts.
Creating a “Zada The Red Panda Book Crochet Pattern” for a book-themed project involves several steps. Below is a detailed guide to help you create your own Zada the Red Panda crochet pattern.
Materials:
- Yan: Happy Cotton (DMC): cream 761 (1 ball), brown 777 (2 balls), red 791 (2 balls). Embroidery thread: black coffee
- Hook: Size 2.5 mm
- Two safety eyes 8mm
- Stuffing (polyfill, cotton wool, etc.), needle for sewing, scissors, pins
- Pink blush for the cheeks.
Abbreviations:
- MR: Magic Ring
- ch: Chain
- sc: Single Crochet
- inc: Increase (2 sc in one stitch)
- dec: Decrease (sc two stitches together)
- sl st: Slip Stitch
- hdc: half double crochet
- dc: double crochet
- tr: treble crochet
- rnd/ rnds: round/ rounds
Note: When you need to decrease: make Invisible Decrease crochet stitches to have a better result. The size of the doll will vary, depending on the yarn used. If you use the same materials as me, the finished size is 15 cm.
HEAD (start with the red yarn)
- R1: sc & into a magic ring [8]
- R2 inc in each st around [16]
- R3: (sc, inc in next st) 8 times [24]
- R4: (sc 2, inc in next st) 8 times [32]
- R5: (sc 3, inc in next st) 8 times [40]
- R6: sc in each st around [40]
- R7: (sc 4, inc in next st) 8 times [48]
- R8 to 11 (4 rounds): sc in each st around [48]
- R12: (sc 7, inc in next st) 6 times [54]
- R13: sc in each st around [54]
- R14: sc 12, inc in each of next 2 st. sc. 5; cream yarn: sc 3; red yarn: sc 9: cream yarm: sc 3: red yarm: sc 5. inc in each of next 2 st, sc 13 (58)
- R15: sc 12, inc in next st, sc 2. inc in next st, sc 4: cream yarn: sc 4: brown yarn: sc 9; cream yarn: sc 4: red yarn: sc 4, inc in next st, sc 2, inc in next st, sc 13 [62]
- R16: sc 14, dec, sc 5: cream yarn: sc 4; brown yarn: sc 11; cream yarn: sc 4; red yarn: sc 5, dec, sc 15 (60)
- R17: sc 19; cream yarn: sc 4: brown yarn: sc 13; cream yarn: sc 4; red yarn: sc 20 [60]
- R18: sc 18; cream yarn: sc 4: brown yarn; sc 15; cream yarn: sc 4; red yarn: sc 19 [60]
- R19: (sc 4, dec) 3 times; cream yarn: sc 4: brown yarm: (dec, sc 4) 2 times, dec. sc; cream yarn: sc 3, dec; red yarn: (sc 4, dec) 3 times [50]
- R20: sc 16; cream yarn: sc 4: brown yarn: sc 3; cream yarm: sc 4; brown yarm: sc 3; cream yarn: sc 4; red yam: sc 16 [50]
- R21: sc 17; cream yarn: sc 4: brown yarn: sc 2: cream yarn: sc 4; brown yam: sc 2: cream yarn: sc 4; red yarn: sc 17 [50]
- R22: (sc 3, dec) 3 times, sc 3: cream yam: dec, sc; brown yam: sc 2: cream yarn: dec, sc 2: brown yarm: sc, dec; cream yarn: sc 2: red yarn: sc. dec. (sc 3, dec) 3 fimes [40] Insert the eyes between rounds 15 and 16. 7 st apart. The eye should be between brown and cream parts, Start stuffing the head firmly, adding more as you go.
- R23: (sc 2, dec) 4 times; cream yarn: (sc 2, dec) 2 times, sc; red yarn: sc, dec, (sc 2. dec) 3 times [30]
- R24: (sc, dec) 4 times; cream yarm: (sc, dec) 2 times, sc; red yarn: dec, (sc, dec) 3 times [20]
- R25: 10 dec (10)
- R26: (sc 3, dec) 2 times [8] Fasten off, weaving in the ends. With the cream yarn, embroider the eyebrow above each eye (1).

Body (start with the brown yarn)
- R1: sc 8 into a magic ring [8]
- R2 inc in each st around [16]
- R3: (sc, inc in next st) 8 times [24]
- R4: (sc 2, inc in next st) 8 times [32]
- R5: sc, inc in next st, sc 3; red yam: (inc in next st, sc 3) 5 times, inc in next st: brown yam: sc 3, inc in next st, sc 2 [40]
- R6: sc 6; red yarm: sc 3, inc in next st, sc 19, Inc in next st, sc 3; brown yarm: sc 7 [42]
- R7 and 8 (2 rounds): sc 6; red yarn: sc 29; brown yarn: sc 7 [42]
- R9: SC 6; red yarm: sc 3, inc in each of next 2 st, sc 19, inc in each of next 2 st, sc 3: brown yarn: sc 7 [46]
- R10: sc 6: red yarn: sc 33: brown yarn: sc 7 [46]
- R11: sc 6; red yarn: sc 4, inc in each of next 2 st, sc 21, inc in each of next 2 st. sc 4; brown yarn: sc 7 [50]
- R12: sc 6; red yarn: sc 5, dec, sc 23, dec, sc 5; brown yarn: sc 7 [48]
- R13 and 14 (2 rounds): sc 6; red yarn: sc 35; brown yarn: sc 7 [48]
- R15: sc 6: red yarn: sc 5. (dec. sc 4) 5 times; brown yarm: sc 7 [43]
- R16 and 17 (2 rounds): sc 6; red yarn: sc 30; brown yarn: sc 7 [43]
- R18: sc 6; red yarn: sc 9, (dec, sc 3) 3 times, sc 6; brown yarn: sc 7 [40]
- R19 and 20 (2 rounds): sc 6; red yarn: sc 27; brown yarn: sc 7 [40]
- R21: sc 6: red yarn: sc 5. (dec, sc 2) 5 times, sc 2: brown yarn: sc 7 [35]
- R22: sc 6; red yarn: sc 22: brown yarn: sc 7 [35]
- R23: sc 6; red yarn: (sc 4, dec) 3 times, sc 4: brown yarn: sc 7 [32]
- R24: sc 6; red yarn: sc 26 [32]
- R25: (sc 6, dec) 4 times [28] Si st. Fasten off, leaving a long tail of white yam for sewing. Stuff the body.
TAIL (start with the brown yarn)
- R1: sc 6 into a magic ring [6]
- R2 inc in each st around [12]
- R3: (sc, inc in next st) 6 times [18]
- R4: (sc 2, Inc in next st) 6 times [24]
- R5: sc in each st around [24] At the end of round 5, take the red yarn. From here to the end, we will alternate 2 rounds in red yarn and 1 round in brown yarn.
- R6: sc in each st around [24]
- R7: (sc 6, dec) 3 times [21]
- R8 to 15 (8 rounds): sc in each st around [21]
- R16: (sc 5, dec) 3 times [18]
- R17 to 21 (5 rounds): sc in each st around [18]
- R22: (sc 4, dec) 3 times [15] Start stuffing the tail, adding more as you go.
- R23 to 25 (3 rounds): sc in each st around [15]
- R26: (sc 3, dec) 3 times [12]
- R27: sc in each st around [12] Ratten the opening of the tail (2) and sc in next 6 st through both layers to close the opening (6). Fasten off, leaving a long tall for sewing (3).

FRONT LEGS (brown yarn; make 2)
- R1: sc 6 into a magic ring [6]
- R2 inc in each st around [12]
- R3: (sc, inc in next st) 6 times [18]
- R4 and 5 (2 rounds): sc 18 [18]
- R6: dec, sc 16 [17]
- R7: dec, sc 15. [16]
- R8: dec, sc 14 [15]
- R9 to 15 (7 rounds): sc in each st around [15] Stuff the leg. Ratten the opening of the leg and sc in next 7 st through both layers to close the opening [7]. Fasten off, leaving a long tail for sewing. With the cream yam, embroider the paw (4).
BACK LEGS (brown yarn; make 2)
- R1: sc 6 into a magic ring [6]
- R2 inc in each st around [12]
- R3: (sc, inc in next st) 6 times [18]
- R4 and 5 (2 rounds): sc 18 [18]
- R6: dec, sc 16 [17]
- R7: dec, sc 15 [16]
- R8 to 16 (9 rounds): sc in each st around [16]
- R17: sc 7 [7] Stop the round here. Stuff the leg. Ratten the opening of the leg and sc in next 8 st through both layers to close the opening [8]. Fasten off, leaving a long tail for sewing. With the cream yarn, embroider the paw (4).
SNOUT (cream yarn)
- R1: sc 6 into a magic ring [6]
- R2 (inc in next st, sc) 3 times [9]
- R3: (inc in next st. sc 2) 3 times [12]
- R4: (sc 3 in the same st, sc 3) 3 times [18]
- R5: sc in each st around [18] Sl st. Fasten off, leaving a long tail of white yarn for sewing. With the black coffee thread, embroider the nose on the snout (5).
EARS (start with white yarn: make 2)
- R1: sc 6 into a magic ring [6]
- R2 (inc in next st, sc) 3 times [9]
- R3: inc in next st, sc 2, inc in next st; brown yarn: sc; cream yarn: sc, inc in next st: brown yarn: sc. 2 [12]
- R4: sc 3: cream yarm: sc 2: brown yarn: sc 3: cream yarn: sc 2: brown yarn: sc 2 [12]
- R5: sc 2, inc in next st; cream yam: sc 2: brown yarn: sc, inc in next st, sc; cream yarn: sc 2: brown yarn: inc in next st, sc [15]
- R6: sc 4: cream yarn: inc in next st, sc; brown yarn: sc 4; cream yarn: inc in next st. sc; brown yarn: sc 3 [17] Si st. Fasten off, leaving a long tail of white yam for sewing (6).
ASSEMBLY
- Sew the nose on head, stuff it before closing.
- Sew the ears on either side of head between rounds 4 and 10 (7 and 8).
- Sew the body to rounds 12 and 20 of the head (9).
- Using the pins to keep the legs in place then sew it to body (10 and 11).
LAST STEP! Give your little red panda a hug and kissi I hope you enjoyed crocheting it, and if you like this pattern, do not hesitate to give it a review.
Explore more crochet pattern: Panda Keychain Crochet Pattern

