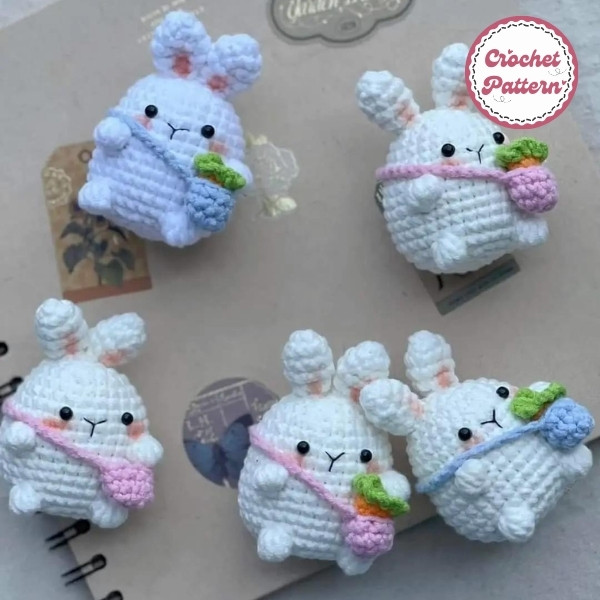
Crocheting is a wonderful way to bring creativity to life, and creating a charming rabbit carrying bag crochet pattern takes that craft to a whole new level. Imagine a cute little rabbit that doubles as a practical, stylish bag—it’s the perfect project for crochet enthusiasts! In this guide, we’ll walk through each step of the process, including all the tools, materials, and techniques you’ll need to make this adorable accessory.
How to create Rabbit Carrying Bag Crochet Pattern
Crochet fans, get ready to fall in love with your next project: the rabbit carrying bag! Combining practicality with playful design, this crochet bag is both functional and fashionable, making it a great addition to any accessory collection.
A rabbit carrying bag crochet pattern is a set of instructions to crochet a bag shaped like a rabbit. The bag often includes a large central compartment, and adorable details like bunny ears and a cute face, making it fun and functional.
Why crochet a rabbit bag? Aside from its charm, this project allows you to:
- Hone your crochet skills with new techniques.
- Create a one-of-a-kind accessory that’s both cute and practical.
- Make unique gifts for friends or family who appreciate handmade items.
Materials
Selecting the correct yarn and hook size is crucial for the rabbit bag’s texture and durability. Here’s what to consider:
- Yarn: Go for a sturdy, medium-weight yarn, like cotton or acrylic, which holds its shape well and withstands daily use.
- Hook Size: For a medium-weight yarn, a 4.0mm to 5.0mm hook works best. Adjust the hook size depending on your yarn choice and the tension you’re comfortable with.
To crochet the rabbit carrying bag, gather the following:
- Yarn in main color (about 150g) and accent color for the face and ears
- Crochet hook (4.0mm to 5.0mm)
- Stitch markers
- Scissors
- Tapestry needle
- Buttons or safety eyes for the face
- Optional: Embroidery thread for finer details
Today, Fanycrafts will help you understand how to crochet a lovely handbag rabbit.
Abbreviations
Familiarity with a few essential stitches will make this project smoother:
- Single Crochet (sc): Creates a tight, firm texture, perfect for shaping the rabbit.
- Slip Stitch (sl st): Used for connecting parts without adding height.
- Half Double Crochet (hdc): Useful for adding a bit of height to sections like the ears.
- ch: Chain sc: Single crochet
- inc: Increase (2 sc in the same stitch)
- dec: Decrease (sc together)
Learning how to increase and decrease stitches will help shape the rabbit’s head and body.
Chart Instruction Rabbit Carrying Bag Crochet Pattern
Start with a magic circle, crocheting in single crochets to create a sturdy base. Increase stitches gradually in a circular pattern until you reach the desired width of the bag. Continue without increases to create depth for the bag.
Body:
- R1: MR 6x
- R2: 6v
- R3: 6(x, v)
- R4: 6(x, v, x)
- R5: 24x
- R6: 6(3x, v)
- R7-9: 30x
- R10: 7x, v, 2x, BO, 8x, BO, 2x, v, 7x
- R11-14: 32x
- R15: 8x, a, 2x, BO, 6x, BO, 2x, a, 8x
- R16: 6(3x, a)
- R17: 6(2x, a)
- R18: 6a
Ears x2:
- R1: MR 6x
- R2: 3(x, v)
- R3-4: 9x
- R5: 3(x, a)
Mini Carrot:
- R1: MR 5x
- R2: x, v, x, v, x
- R3-5: 7x
- R6: change green yarn to make 4ch crochet leaves, slst
Bag:
- R1: 4ch, quay lại 2x, w, x, v
- R2-3: 8x up to 35ch as strap
Tips for begineers:
- Take it slow: Crocheting a 3D shape can be challenging.
- Use stitch markers to help track your rows and rounds.
- Practice basic stitches before starting the project to build confidence.
In addition, you can refer to many other crochet patterns from Fanycrafts at the All Crochet Patterns blog.
Conclusion
With some patience and creativity, you can create an adorable rabbit carrying bag that combines charm with practicality. This project is a delightful way to express yourself through crochet while crafting a functional accessory.

