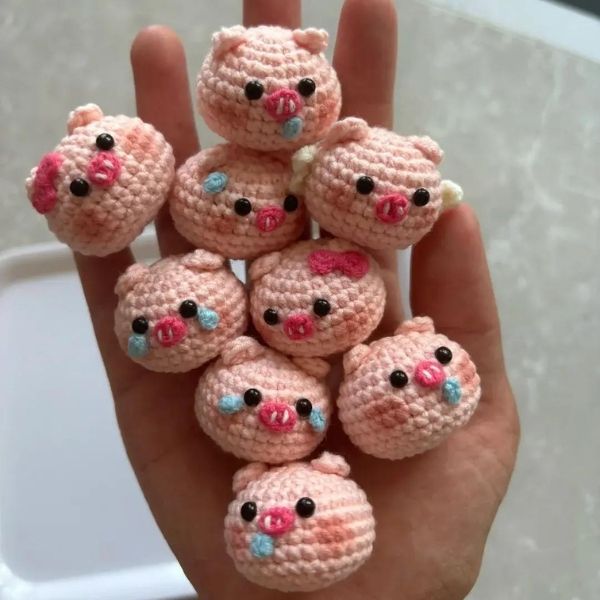
Crocheting your very own mini pig keychain is a fun and adorable project for crochet lovers of all levels. Whether you’re crafting for yourself or as a gift, this little piggy is sure to bring smiles. In this article, we’ll guide you step by step on how to create a unique mini pig keychain crochet pattern that’s both cute and functional. By the end, you’ll have your own mini pig keychain in hand! Let’s get started with Fanycrafts!
How to create Mini Pig Keychain Crochet Pattern
Have you ever wanted to create something small, cute, and portable? Well, a mini pig keychain crochet project might just be the perfect fit! Not only are crochet keychains adorable, but they’re also functional and make great personalized gifts. In this article, we’ll take you through the steps of crafting a mini pig keychain using basic crochet techniques. Even if you’re a beginner, don’t worry – we’ve broken everything down to make it easy to follow.
Materials You’ll Need
Before diving into the pattern, let’s talk about the materials you’ll need:
- Yarn: Soft cotton or acrylic yarn works best for amigurumi. You’ll need pink yarn for the pig’s body, a small amount of black for the eyes, and optional white for details.
- Crochet Hook: For this project, a 2.5 mm or 3.0 mm crochet hook is ideal for tight stitches.
- Stuffing: Polyfill or any soft fiberfill to give your pig a cute, plush look.
- Tapestry Needle: To sew pieces together and weave in ends.
- Keychain Ring: You’ll need a metal ring to attach your crocheted pig.
- Stitch Marker: This will help keep track of your rows as you crochet.
Understanding Basic Crochet Stitches
Before starting the pattern, it’s important to get familiar with the following basic crochet stitches:
- Chain Stitch (CH): A foundation stitch that begins most crochet projects.
- Single Crochet (SC): The core stitch used in amigurumi for creating tight, dense fabric.
- Slip Stitch (SL ST): A quick, simple stitch to join pieces or finish off rows.
- Increase (INC): Adding stitches by crocheting two SCs into one stitch.
- Decrease (DEC): Reducing stitches by turning two stitches into one.
Explore more crocehet pattern: Hello Kitty Devil Crochet Pattern
Chart Instructions
Body:
- R1: 6x
- R2: 6v
- R3: 6(x, v)
- R4: 6(x, v, x)
- R5: 6(3x, v)
- R6-10: 30x
- R11: 6(3x, a)
- R12: 6(x, a, x)
- R13: 6(x, a)
Bow: MR 5(2ch, sl).
Nose: 3ch, x, w, v.
Ears x2: MR 4x tighten without lining.
Snot, sweat drops: MR 3x and tighten without lining.
Gently stuff the body and head, making sure not to overfill. You want the pig to be soft and squishable without looking overly tight. Once your pig is assembled, attach the keychain ring to the top of the head using a secure knot. Feel free to add your own unique touches – like a mini bow, different colored yarn, or even a little hat for your pig!
Remember to adjust the hook size and yarn weight if needed to achieve the desired results. Have fun creating your adorable mini pig keychain!
Customization:
- Color: Experiment with different yarn colors for a unique look.
- Size: Adjust the number of rows to create a larger or smaller pig.
- Details: Add details like eyes, a patch, or a ribbon for a more personalized keychain.
After everything is assembled, give your pig a light shaping, and you’re done! Block the pig to give it a polished finish. Enjoy your crochet project! In addition, you can refer to many other crochet patterns from Fanycrafts at the All Crochet Patterns blog.
Conclusion
Crocheting a mini pig keychain is a rewarding and fun project that you can easily customize. Whether for yourself or as a gift, it’s a great way to show off your crochet skills and create something useful. Keep practicing, and soon, you’ll be making a whole collection of adorable animal keychains!

