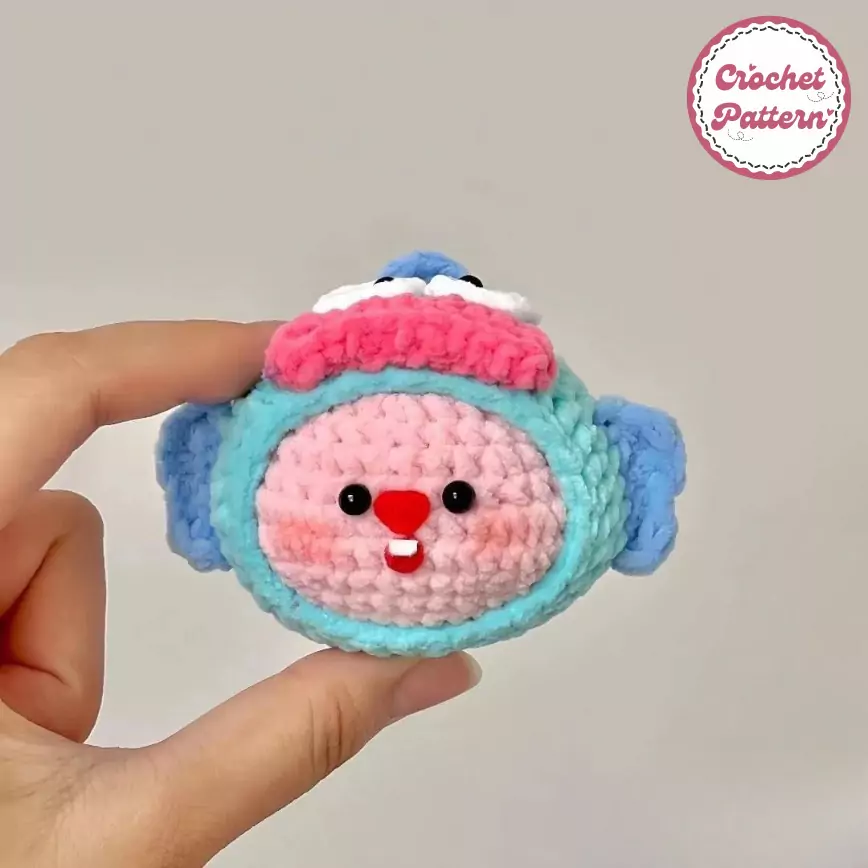
Create a cute, fun Loppy Puffer Fish Crochet Pattern quickly with this detailed tutorial. With this crochet pattern, you can use it to decorate your home, make keychains or gifts for friends and loved ones. Whether you’re making it as a gift or a keepsake, Fanycrafts will help you create an adorable Loppy Puffer Fish Crochet Pattern.
Loppy Puffer Fish Crochet Pattern
A puffer fish, with its unique, round body and spiky fins, is an ideal choice for amigurumi. Its distinctive look makes it both challenging and rewarding to create, offering a perfect blend of fun and complexity. Loppy Puffer Fish Crochet Pattern creates a cute and cuddly amigurumi puffer fish with a floppy body.
Materials:
- Worsted weight yarn in main color (yellow), contrasting color (orange) for spots, and black for eyes
- Crochet hook size appropriate for your yarn (typically a size D/3)
- Fiberfill stuffing
- Yarn needle
- Safety eyes (optional)
Stitches Used:
- Single crochet (sc)
- Increase (inc) – 2 single crochets in one stitch
- Decrease (dec) – slip stitch two stitches together
Body:
- Start with a magic ring in your main color.
- Round 1: Crochet 6 sc in the magic ring. Slip stitch to join (6 sc).
- Round 2: Increase in each stitch around (12 sc). Slip stitch to join.
- Rounds 3-8: Work 1 sc in each stitch around. Slip stitch to join at the end of each round (12 sc each round).
- Round 9: Sc in the next 2 stitches, inc in the next stitch Repeat around. Slip stitch to join (18 sc).
- Rounds 10-14: Work 1 sc in each stitch around. Slip stitch to join at the end of each round (18 sc each round).
- Round 15 (Shaping for floppy body): Sc in the next 3 stitches, dec Repeat around. Slip stitch to join (12 sc).
- Rounds 16-18: Work 1 sc in each stitch around. Slip stitch to join at the end of each round (12 sc each round).
- Stuff firmly.
- Round 19: Decrease in each stitch around. Fasten off and weave in ends.
Tail Fins (make 2):
- Chain 5.
- Turn, sc in the 2nd chain from hook, sc in each chain to the end (4 sc).
- Chain 2, turn, dec, sc in each stitch around (3 sc).
- Chain 2, turn, dec, sc in each stitch around (2 sc).
- Fasten off and weave in ends.
- Sew tail fins to opposite sides of the body.
Mouth:
- With contrasting color, embroider a small smile shape on the bottom of the body.
Spots:
- With contrasting color, embroider small circles randomly on the body.
Eyes:
- Attach safety eyes or embroider small black circles for eyes.
Finishing Touches:
- You can add a small loop of yarn at the top for hanging (optional).
Tips:
- You can adjust the size of your puffer fish by using a different yarn weight or crochet hook size.
- Be sure to stuff the body firmly to create a nice, floppy shape.
- You can experiment with different colors and add other details, such as fins or gills.
This is a basic pattern to get you started. Feel free to get creative and make your own floppy puffer fish!

