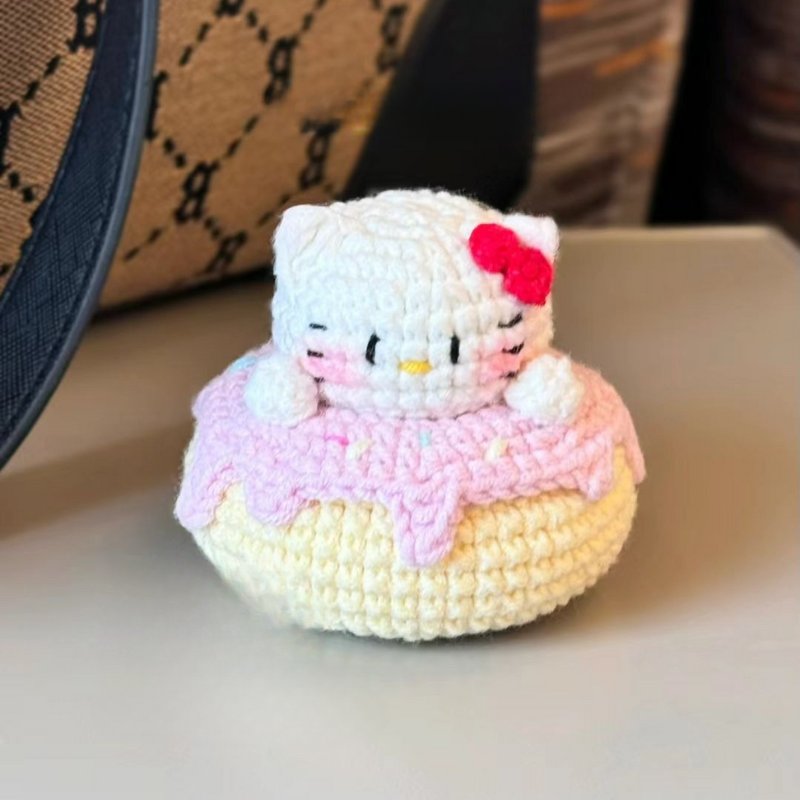
So, you’re ready to embark on the whimsical journey of creating a Kitty Donut Crochet Pattern? Whether you’re a seasoned crocheter or a curious beginner, this adorable project is bound to bring joy and charm to your crafting repertoire. But what exactly is a Kitty Donut Crochet Pattern? Simply put, it’s a delightful fusion of a cute kitty face with a donut shape, resulting in an irresistibly sweet amigurumi toy or decorative piece.
How to create Kitty Donut Crochet Pattern
Very happy to share with you how to create a cute and adorable Kitty Donut Crochet Pattern. Fanycrafts hopes, you will like it and if you find it interesting, please share this article with your friends because it means a lot to us.
Before starting the project, practice the basic stitches to build confidence. Pay attention to how you hold the yarn and the hook, adjusting as needed for consistency. Mark the beginning of each round to keep track of your stitches and prevent mistakes.
Materials Needed
Yarn Selection: To start, you’ll need some yarn. For this project, a medium-weight (worsted) yarn is ideal. Choose colors that appeal to you for the donut and kitty features. Think of soft pastels or vibrant hues to give your kitty donut a playful look.
Crochet Hook Size: A 4.0 mm (G-6) crochet hook works well with medium-weight yarn. It allows for tight, even stitches, perfect for amigurumi.
Other Essential Tools:
- Stitch markers
- Scissors
- Yarn needle
- Safety eyes or black yarn for the eyes
- Polyfill stuffing
Basic Crochet Stitches
- Chain Stitch (ch): The foundation of many crochet projects, the chain stitch is the starting point for most patterns.
- Slip Stitch (sl st): Used to join rounds and create seamless pieces.
- Single Crochet (sc): A tight stitch that’s the backbone of amigurumi, providing structure and detail.
- Double Crochet (dc): While not as commonly used in this pattern, it’s useful for larger projects and creating texture.
Chart Instructions
Donut:
- R1: 20ch, connected to the first square to form a circle
- R2: 20x
- R3:10(x, v)
- R4: 30x
- R5: 10(x, v, x)
- R6: 40x
- R7:10 (3x, v)
- R8-R12: 50x
- R13: 10(3x, a)
- R14: 40x
- R15: 10(x, a, x)
- R16: 30x
- R17: 10(x,a)
- R18: 20x connected to R1 while sewing and stuffing
Cream:
- R1-R7: like cake part
- R8: hook x as desired, up 4ch hook to leg t2: x, T, F, sk2, x as desired, up 3ch hook to leg t2: x, T, sk1
Hand:
- R1: MR 6x
- R2: 6x
Bow tie: MR 2(2ch, 2T, 2ch, sl)
Ears x2: 3ch, hook to the 2nd leg: x, F
Head:
- R1: MR 6x
- R2: 6v
- R3: 6(x, v)
- R4: 6(x, v, x)
- R5-R8: 24x
- R9: 6(x, a, x)
- R10: 6(x, a) stuffed, sewn closed
Enjoy your crochet project! In addition, you can refer to many other crochet patterns from Fanycrafts at the All Crochet Patterns blog.
Conclusion
Creating a Kitty Donut Crochet Pattern is a delightful and rewarding project that combines creativity and skill. From selecting materials to adding the final touches, every step is an opportunity to infuse personality and charm into your creation. So grab your hook and yarn, and let your imagination run wild!

