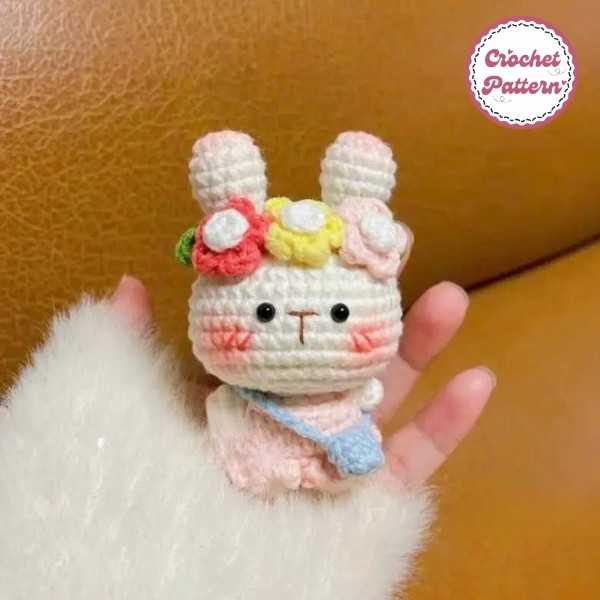
Creating a crochet baby bunny can be a delightful project, whether you’re a beginner or an experienced crocheter. With this guide, you’ll learn step-by-step instructions to make a charming baby bunny that’s soft, cute, and perfect for gifts or decorations. Fanycrafts will dive into everything from selecting materials to detailed pattern steps.
How to create Baby Bunny Crochet Pattern
Crocheting a baby bunny is a fun and rewarding project, suitable for all skill levels. These cuddly creations make charming gifts for children, holiday decorations, or cute additions to your home. Plus, the process of making each part and bringing it all together offers a great way to practice essential crochet skills.
Materials Needed for Baby Bunny Crochet Pattern
Here are the materials you’ll need to create a Baby Bunny Crochet Pattern:
Yarn:
- White yarn for the main body
- Pink or light blue yarn for the nose and inner ears (optional)
Crochet Hook:
- A 3.5mm or 4mm crochet hook is suitable for worsted weight yarn.
Stuffing Material:
- Polyester fiberfill is a common choice for stuffing amigurumi.
Tapestry Needle:
- For sewing the pieces together.
Scissors:
- For cutting the yarn.
Stitch Marker (optional):
- To keep track of your rounds.
Safety Eyes (optional):
- For a more detailed look, you can use safety eyes for the bunny’s eyes. If you prefer, you can also embroider the eyes.
Remember, these are just basic materials. You can customize your bunny by adding accessories like a bow or a scarf, which might require additional yarn or other materials.
Basic Stitches and Techniques for Your Baby Bunny
To create your adorable baby bunny, you’ll primarily need to master two basic stitches:
1. Magic Ring (MR):
- This creates a foundation for working in rounds without a visible hole in the center.
- How-to:
- Make a slip knot.
- Yarn over and insert your hook into the slip knot.
- Yarn over and pull through the slip knot.
- Repeat steps 2 and 3 five more times.
- Yarn over and pull through all loops on the hook.
2. Single Crochet (SC):
- This is a simple stitch that creates a flat surface.
- How-to:
- Insert your hook into the designated stitch.
- Yarn over and pull through the stitch.
- Yarn over and pull through both loops on the hook.
Additional Techniques:
- Increasing: To increase the number of stitches in a round, work two single crochets into a single stitch.
- Decreasing: To decrease the number of stitches in a round, work two single crochets together.
- Joining Rounds: To seamlessly join rounds, slip stitch the first stitch of the new round to the last stitch of the previous round.
- Stuffing: Once you’ve reached the desired size, stuff your piece with polyester fiberfill. Leave a small opening to finish stuffing and then sew it closed.
- Sewing: Use a yarn needle to sew the pieces together. Match the stitches carefully to create a neat finish.
Visual Learning:
If you’re a visual learner, there are many online tutorials and YouTube videos that can help you master these techniques. Search for terms like “crochet for beginners,” “amigurumi tutorial,” or “crochet bunny tutorial.”
Remember:
- Practice makes perfect. Don’t get discouraged if your first attempts aren’t flawless.
- Read the pattern carefully before starting.
- Use stitch markers to keep track of your rounds.
- Have fun and enjoy the process!
By mastering these basic stitches and techniques, you can create a variety of adorable crochet projects, including your own baby bunny.
Explore now: Mini Santa Claus Crochet Pattern
Chart Instructions Baby Bunny Crochet Pattern
Head:
- R1: MR 6x
- R2: 6v
- R3: 6(x, v)
- R4: 6(x, v, x)
- R5: 6(3x, v)
- R6: 6(2x, v, 2x)
- R7: 6(5x, v)
- R8-10: 42x
- R11: 10x, 3(x, v), 10x, 3(x, v), 10x
- R12: 48x
- R13: 8(2x, a, 2x)
- R14: 8(3x, a)
- R15: 8(x, a, x)
- R16: 8(x, a)
- R17: 8a
- R18: 4a
Ears x2:
- R1: MR 6x
- R2: 6v
- R3-5: 12x
- R6: 3(2x, a)
- R7-8: 9x
Hand x2: R1-3: 6x
Petal: 2CH, corn tip, 2CH, SL 5 aluminum hook
Pistil: R1: 6x
Leaf: 6CH, insert needle into 2 hooks X, T, F, T, W, T, F, T, X
Dress:
- R1: 22CH, join with 22f crochet st
- R2: 4x, 5CH, K3, 8x, 5CH, K3, 4x
- Skirt hem: x, 3CH, x, repeat to end of row
Assembly:
- Sew the ears to the top of the head.
- Sew the tail to the back of the body.
- Sew the head to the body.
- Embroider the eyes, nose, and mouth.
Optional:
- Use safety eyes instead of embroidery.
- Crochet tiny feet and hands.
- Add a pink or blue bow to the ear.
Tips:
- Use a stitch marker to keep track of your rounds.
- Stuff the pieces firmly, but not too tightly.
- Use a tapestry needle to sew the pieces together neatly.
- Experiment with different colors and sizes.
Enjoy your adorable baby bunny! Double-check that all pieces are sewn securely. Consider adding a small ribbon or scarf around the bunny’s neck for extra flair. Wrap your bunny in tissue or place it in a gift box for a lovely presentation.
Conclusion
Making a baby bunny crochet pattern is a fantastic project that brings joy both in creation and as a finished gift. With just a few materials and some basic techniques, you’ll be able to create a cute and lovable bunny that’s perfect for any occasion.

