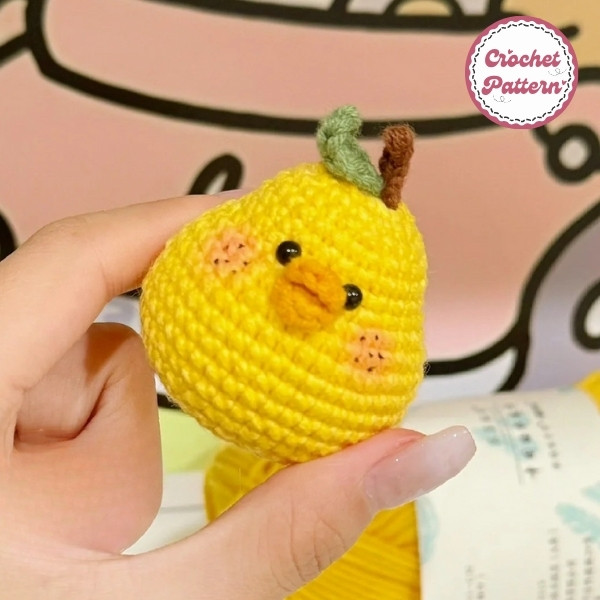
Creating adorable crochet patterns is a wonderful way to add a personal touch to your crafts. One of the cutest projects you can take on is designing a duck crochet pattern. Whether you are an experienced crocheter or just starting out, making a cute duck can be a fun and rewarding project. In this article, Fanycrafts will guide you step-by-step on how to create a cute duck crochet pattern, covering everything from the materials you’ll need to tips for bringing your design to life. Let’s dive in!
How to create Cute Duck Crochet Pattern
Are you looking for a cute and beginner-friendly crochet project? A duck crochet pattern is a perfect choice! Crocheting cute animals, often called “amigurumi,” is a popular hobby that lets you craft your very own toys or decorations.
Ducks are especially charming with their round bodies, tiny wings, and adorable beaks, making them a great project to work on. Plus, they’re perfect for gifts, nursery décor, or just something to add to your collection of handmade items.
Materials Needed for Cute Duck Crochet Pattern
Before you begin, let’s make sure you have everything you need to create the perfect duck. Here’s a list of essential materials.
When crocheting a duck, you’ll want to choose yarn that is soft but holds its shape well. Cotton yarn is an excellent choice for its durability and neat stitches. Acrylic yarn is another great option if you want a softer, fluffier duck.
The hook size you use will depend on the type of yarn you select. For most amigurumi projects, a 3.5 mm or 4.0 mm crochet hook works well with worsted-weight yarn. This size will give you tight stitches that help the duck hold its shape better.
Basic Crochet Stitches
Here are some of the most basic crochet stitches that every beginner should learn:
- Single Crochet (SC): The single crochet (SC) is the basic stitch you’ll use throughout the pattern. It creates tight, durable stitches that are perfect for amigurumi.
- Increase (INC): Increasing is simply adding more stitches into one to expand your work. It’s crucial for shaping the body of your duck.
- Decrease (DEC): Decreasing allows you to taper the shape of your duck, especially when creating the head and body.
Anatomy of Cute Duck Crochet Pattern
Breaking the duck down into its main parts will help you understand how the pattern comes together:
- Head and Body: The head and body are usually crocheted in continuous rounds, starting with a magic ring and building out. The head is typically a ball shape, while the body is more oval-shaped.
- Wings and Tail: The wings and tail are crocheted separately and sewn onto the body. They are small, simple pieces but add a lot of character.
- Beak and Feet: The beak and feet are tiny but crucial for adding personality to your duck. These pieces are often crocheted in bright colors like orange or yellow.
Explore more crochet: Pusheen with Donut Crochet Pattern
Chart Instructions
Fruit:
- R1: MR 6x
- R2: 6v
- R3: 6(x, v)
- R4: 6(x, v, x)
- R5-7: 24x
- R8: 6(3x, v)
- R9: 6(2x, v, 2x)
- R10: 6(5x, v)
- R11-15: 42x
- R16: 6(5x, v)
- R17: 6(2x, a, 2x)
- R18: 6(3x, a)
- R19: 6(x, a, x)
- R20: 6(x, a)
- R21: 6a
Petiole: 5ch, hook on 2nd leg 4x
Leaf: 5ch, hook on 2nd leg: x, t, f, t, x
Mouth: MR 2(2ch, 2t, 2ch, sl)
You’ve created a cute little crochet duck! Customize it with different colors and add details like a bow or a scarf. Enjoy your crochet project! If your duck isn’t looking quite right, double-check your stitch counts and ensure all parts are securely attached.
You can customize your duck by changing its size, using different yarn types, or even adding clothes and accessories! In addition, you can refer to many other crochet patterns from Fanycrafts at the All Crochet Patterns blog.
Conclusion
By following this guide, you now know how to create a cute and charming duck crochet pattern from scratch. With just a little time and patience, you can craft an adorable amigurumi duck that will bring joy to anyone who sees it. Have fun with your project and get creative with the details to make it truly your own!

