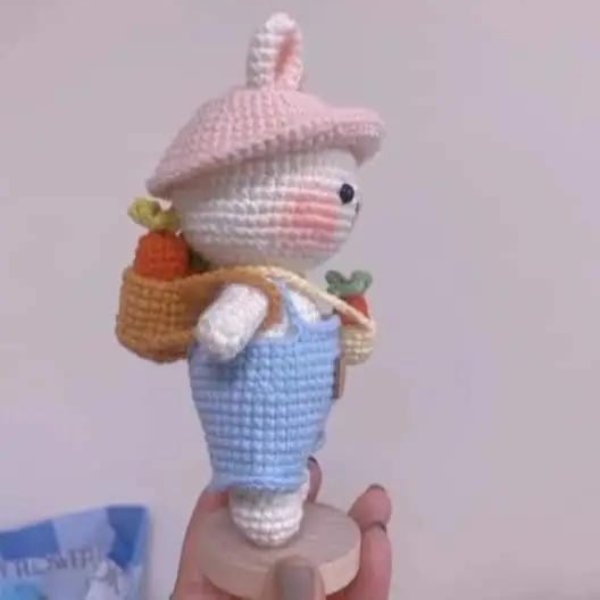
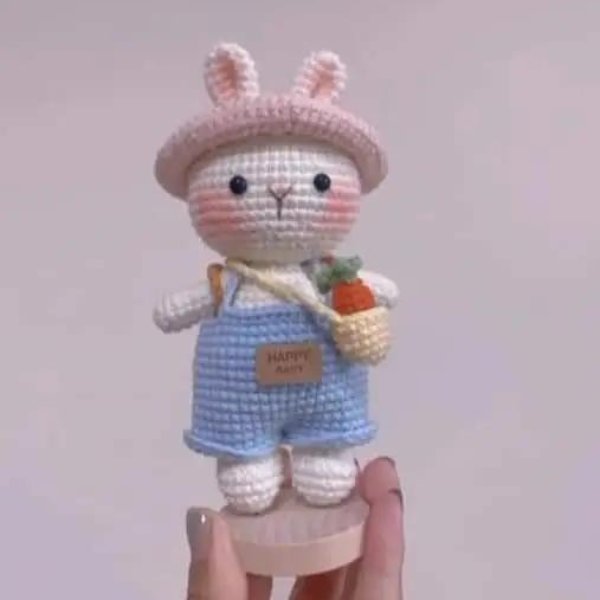
Welcome to the magical world of crochet! Today, we’re diving into a delightful project that’s sure to charm both beginners and seasoned crocheters alike: the Bunny Wearing Bag crochet pattern. This cute and functional accessory combines the whimsy of a crocheted bunny with the practicality of a small bag, making it a perfect gift or a fun addition to your own collection.
How to create Bunny Wearing Bag Crochet Pattern

Very happy to share with you how to create Bunny Wearing Bag Crochet Pattern. Fanycrafts hopes, you will like it and if you find it interesting, please share this article with your friends because it means a lot to us.
This pattern creates a cute little bunny amigurumi with a crossbody bag! It’s perfect for a gift or a fun project for yourself.
Materials Needed
Before we get started, let’s gather all the materials you’ll need for this project:
- Yarn: Choose a soft, medium-weight yarn in your preferred bunny and bag colors. Popular choices include pastel shades for a more whimsical look.
- Crochet Hooks: Typically, a 3.5mm (E-4) and a 4mm (G-6) hook are suitable for this pattern.
- Additional Tools: Scissors, stitch markers, a yarn needle for sewing parts together, and optional decorative elements like buttons or bows.
- Tapestry needle
- Stuffing
- Buttons (2) for eyes (optional)
- Safety eyes (optional)
- Scissors
Note: This pattern is a basic guideline. Feel free to adjust colors, yarn weight, and hook size to create your own unique bunny.
Crochet patterns come with their own language. Here are some common terms and abbreviations you’ll encounter:
- Chain (ch): The foundation of most crochet projects.
- Single Crochet (sc): A fundamental stitch that creates a tight fabric.
- Double Crochet (dc): A taller stitch that adds height and texture.
- Slip Stitch (sl st): Used for joining and finishing.
- Magic Ring (MR): An adjustable loop that starts crocheting in the round.
See more crochet pattern: Mini Omelet Keychain Crochet Pattern
Chart Instructions
Head:
- R1: MR 6x
- R2: 6V
- R3: 6(x, v)
- R4: 6(x, v, x)
- R5: 6(3x, v)
- R6: (2x, v, 2x)
- R7: 6(5x, v)
- R8: 6(3x, v, 3x)
- R9: 6(7x, v)
- R10-16: 54x
- R17: 6(7x, a)
- R18: 6(3x, a, 3x)
- R19: 6(5x, a)
- R20: 6(2x, a, 2x)
- R21: 6(3x, a)
- R22: 6(x, a, x)
Leg x2:
- R1: MR 6x
- R2: 6V
- R3: 6(x, v)
- R4-5: 18x
- R6: 5x, 4a, 5x
- R7-9: 14x
Ear x2:
- R1: MR 6x
- R2: 6v
- R3: 3(3x, v)
- R4-7: 15x
Body:
- Go up 3ch and connect pin t2 to pin 1
- R1: 14x, 3x, 14x, 3x
- R2: 6x
- R3: 3(11x, v)
- R4: 3(6x, v, 6x)
- R5-9: 42x
- R10: 3(6x, a, 6x)
- R11: 3(11x, a)
- R12: 3(5x, a, 5x)
- R13: 3(9x, a)
- R10: 3(6x, a, 6x)
- R11: 3(11x, a)
- R12: 3(5x, a, 5x)
- R13: 3(9x, a)
- R14: 3(4x, a, 4x)
- R15: 27x
- R16: 3(7x, a)
- R17: 24x
Tail:
- R1: MR 6x
- R2: 6v
- R3-4: 12x
- R5: 6a
Hand x2:
- R1: MR 5x
- R2: 5v
- R3-10: 10x
- R11: (8x, a)
Trousers:
- R1-2: up 24ch, hook 2 loops 24x, then connect pant leg t2 and pant leg 1
- R3: 48x
- R4-10: 48x
- R11: 11x, a, 22x, a, 11x
- R12-14: 46x
Front bib:
- R15: center and hook 14x
- R16: then turn jasmine, up 1ch and then hook 14x
Strap: Crochet 15 inches from the edge of the front piece, find a stitch in the middle of the back piece to connect and pull out, then repeat 15 inches to connect with the left side of the previous piece.
Bag:
- R1: MR 6x
- R2: 6v
- R3: 6(x, v)
- R4-6: 18x
- String the bag to the appropriate length
Big Carrot:
- R1: 6x
- R2: 6v
- R3: 3(x, v)
- R4-5: 9x
- R6: 3(2x, v)
- R7-8: 12x
- R9: 6a
Small Carrot:
- R1: 5x
- R2: 5x
- R3: 2(x, v), x
- R4: 7x
- R5: 2(2x, v), x
- R6: 4a, x
Tips:
- Use stitch markers to help keep track of your rounds.
- Change yarn colors by weaving in the ends securely.
- Stuff the bunny firmly to maintain its shape.
Customizations:
- You can crochet the bag in any shape or size you like.
- Get creative! Add pockets, embellishments, or personalize the bag with initials.
- Make the bunny hold other objects like carrots or flowers.
This is a basic pattern, there are many resources available online for more detailed instructions with pictures. You can find tutorials for amigurumi bodies, crocheting bags, and bunny faces. With a little practice, you’ll be crocheting adorable bunny bags in no time!
Enjoy your crochet project! In addition, you can refer to many other crochet patterns from Fanycrafts at the All Crochet Patterns blog.
Conclusion
Creating a Bunny Wearing Bag crochet pattern is a rewarding and enjoyable project that combines creativity with functionality. Whether you’re making it as a gift or for yourself, the end result is sure to bring a smile to anyone’s face. So grab your yarn and hook, and start crafting your adorable bunny today!

