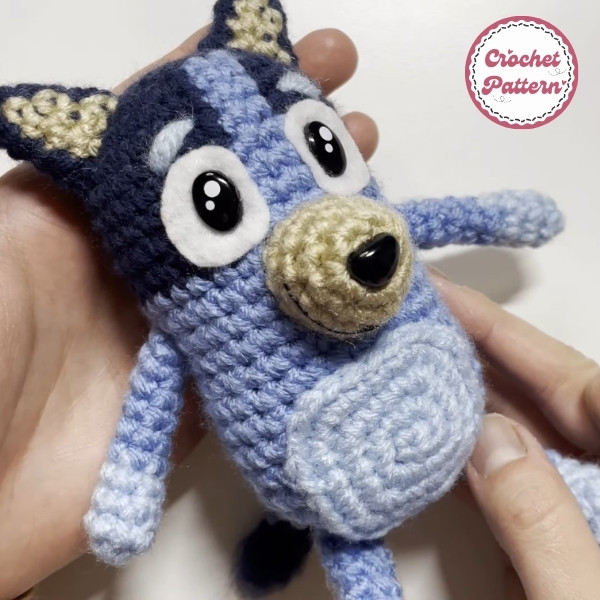
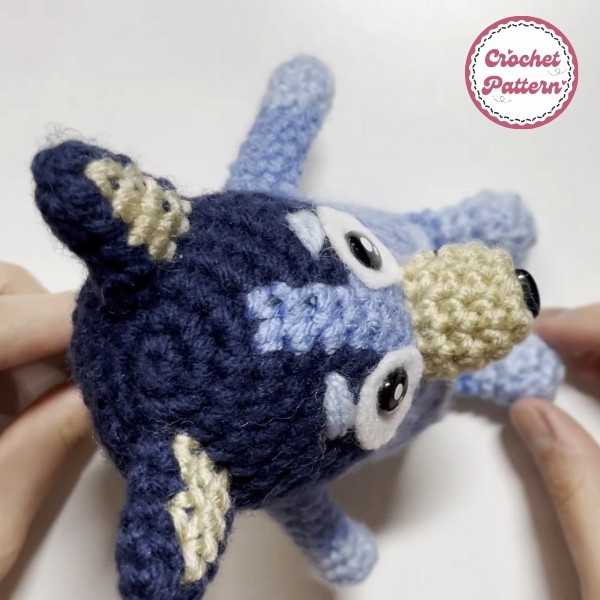
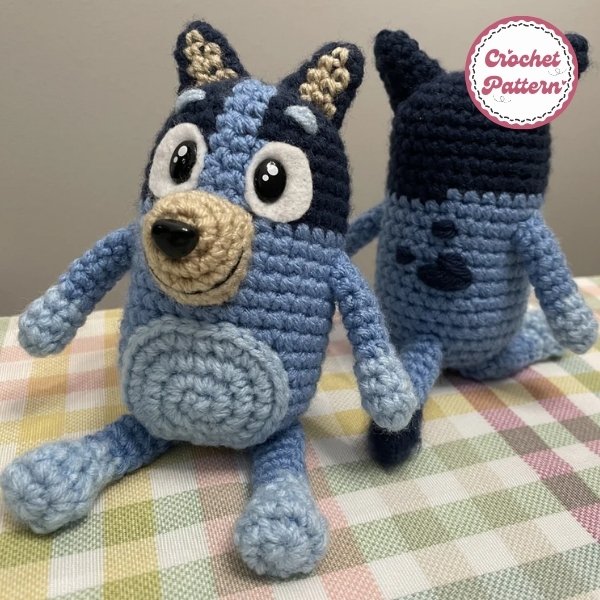
If you have seen the cartoon Bluey, you will understand how cute, funny and sweet this dog is? Fanycrafts was inspired to crochet Bluey Crochet Pattern, and after a few samples, I am finally satisfied with my final Bluey pattern! Now, you can own a lovely Bluey by crocheting with your own hands. Let’s discover how to crochet!
Introduction about Bluey
Bluey, a spirited Blue Heeler puppy, has captured the hearts of children and adults alike with her imaginative and playful adventures. This Australian animated television series follows Bluey and her family as they engage in imaginative games that often mirror real-life situations.
Through their playful escapades, Bluey and her family explore themes of family, friendship, and creativity. The show’s unique blend of humor, heart, and relatable storytelling has made it a global phenomenon.
The show is known for its humor, creativity, and positive messages about family, friendship, and imagination. It has become a popular children’s show worldwide, praised for its engaging storytelling and relatable characters.
How to create Bluey Crochet Pattern

Crochet enthusiasts, get ready to dive into the delightful world of Bluey! Whether you’re crafting for yourself or creating a heartfelt gift for a fan, making a crochet version of this beloved character can be as fun as the show itself. This guide will walk you through everything you need to know about creating your own Bluey crochet pattern.
Materials and Tools Needed
Creating a crochet Bluey starts with gathering the right tools and materials. Here’s what you’ll need:
- Crochet Hook: A 3.5mm or 4mm hook works best for amigurumi projects.
- Yarn: Choose soft, durable yarn in Bluey’s signature shades—blue, light blue, white, and black.
- Stuffing: Polyfill stuffing to make Bluey plush and cuddly.
- Stitch Markers: To track rounds.
- Embroidery Floss and Needle: For the finer details like Bluey’s face.
- Scissors: Sharp scissors for cutting yarn.
Abbreviations key:
- sts = stitches
- mc = magic circle
- ch = chain
- dc = double crochet
- inc = double crochet two stitches in the same stitch, increasing the amount of stitches.
- dec = double crochet two stitches together (or decreasing using which ever method your prefer)
The total amount of stitches you should have will be in parentheses at the end of each row. Meaning that when you see (20) at the end of a row, it means there will be 20 stitches in that row.
Any repeated actions within a row will also be in parentheses, alongside the amount of times that action will be taken in that row. Example. (2dc, inc) x 10 means two double crochets then increase on the third, repeat this ten times.
(Note: We use the term double crochet in this pattern, but you might call it a single crochet where you live)
In Bluey Crochet Pattern we will also note when to change colours, and will note when to change colours using their designation (example: 20sts in C1, 5 sts in C2, 20sts in C1). If you’re unfamiliar with any of these, plenty of beginner tutorials are available online to help you practice.
Understanding Bluey’s Design
Bluey’s charm lies in her simple yet expressive design. To replicate her look, focus on these aspects:
- Body Shape: Bluey has a cylindrical body with stubby arms and legs.
- Facial Features: Her big, expressive eyes and smiling mouth are a must.
- Colors: Light blue for the body, dark blue for accents, and white for details.
The right color palette makes all the difference. Look for yarn shades that match Bluey’s animated hues as closely as possible. You might want to take a reference photo along when shopping for supplies.
Designing the Bluey Crochet Pattern
Start by drawing Bluey on paper. Divide her into sections: head, body, arms, legs, tail, and ears. This visual roadmap will help you create a crochet plan.
Next, assign stitches and rows to each section. For example:
- Head: Start with a magic ring and increase in each round until you reach the desired width.
- Body: Maintain a consistent stitch count to form a cylinder.
Write down every step to ensure you don’t miss any detail.
Crochet a prototype to test your pattern. This step lets you refine stitch counts and proportions. It’s okay to make adjustments it’s all part of the process!
Explore more crochet collections: Free Baby Bunny Crochet Pattern
Chart Instruction Bluey Crochet Pattern

Body:
- In dark blue,
- R1: 6 sc in MR (6)
- R2: 6 inc (12)
- R3: (1 sc, inc)x6 (18)
- R4: (inc, 2 sc)x2, inc, 2 sc, (inc, 2 sc)x3 (24)
- R5: (inc, 3 sc)x2, inc, 1 sc, 2 sc, (inc, 3 sc)x3 (30)
- R6-7: 13 sc, 2 sc, 15 sc (30)
- R8-9: 13 sc, 3 sc, 14 sc (30)
- R10-11: 12 sc, 5 sc, 13 sc (30)
- R12-22: 1 sc in each st (30)
- Pause here to attach eyes, glue felt, and sew on nose.
- R23: (3 sc, dec)x6 (24)
- R24: (2 sc, dec)x6 (18)
- R25: (1 sc, dec)x6 (12)
- R26: 6 dec (6)
- Fasten off and weave in the end.
Nose:
- In tan,
- R1: 5 sc in MR (5)
- R2: 5 inc (10)
- R3: 2 inc, 6 sc, 2 inc (14)
- R4-5: 1 sc in each st (14)
- Fasten off, leaving a tail for sewing. Attach safety nose directly in the center of R1. Orient the nose so that the bottom of the nose is aligned with your last stitch.
Ears (Make 2):
- In dark blue,
- R1: 5 sc in MR (5)
- R2: 1 sc, inc, 1 sc, 1 sc, inc (7)
- R3: 3 sc, 2 sc, 2 sc (7)
- R4: 2 sc, inc, 2 sc, 1 sc, inc (9)
- R5: 3 sc, inc, 3 sc, 1 sc, inc (11)
- Fasten off, leaving a tail for sewing.
Arms (Make 2):
- In light blue,
- R1: 6 sc in MR (6)
- R2: (2 sc, inc)x2 (8)
- R3: (2 sc, dec)x2 (6)
- R4: 1 sc in each st (6) change color to medium blue
- R5-10: 1 sc in each st (6)
Feet (Make 2):
- R1: 8 sc in MR (8)
- R2: 8 inc (16)
- R3: 8 dec (8)
- R4: (2 sc, dec)x2 (6)
- R5: 1 sc in each st (6) change color to medium blue
- R6-11: 1 sc in each st (6)
Tail:
- In dark blue,
- R1: 6 sc in MR (6)
- R2-4: 1 sc in each st (6) change color to medium blue
- R5-10: 1 sc in each st (6)
Belly:
- In light blue,
- R1: 4 sc in MR (4)
- R2: 3 sc in each st (12)
- R3: (1 sc, 3 sc in next st, 1 sc)x4 (20)
- R4: 2 sc, 3 sc in next st, 3 sc, inc, 1 sc, inc, 2 sc, inc, 1 sc, inc, 3 sc, 3 sc in next st, 2 sc (28)
- Fasten off, leaving a long tail for sewing.
Finishing:
- Sew ears to the top of the body.
- Sew arms and feet to body.
- Sew belly onto the body.
- Embroider mouth onto the nose.
- Use light blue yarn to add eyebrows.
- Use dark blue yarn to add 3 spots on Bluey’s back.
- Optional: Use a wire pet brush to brush out the tip of Bluey’s tail.
Conclusion
Creating your own Bluey crochet pattern is a rewarding journey that combines creativity and skill. Whether it’s your first attempt or you’re a seasoned crocheter, don’t hesitate to experiment and make Bluey truly your own. Once finished, share your masterpiece with friends, family, or your crochet community they’ll surely adore it!

