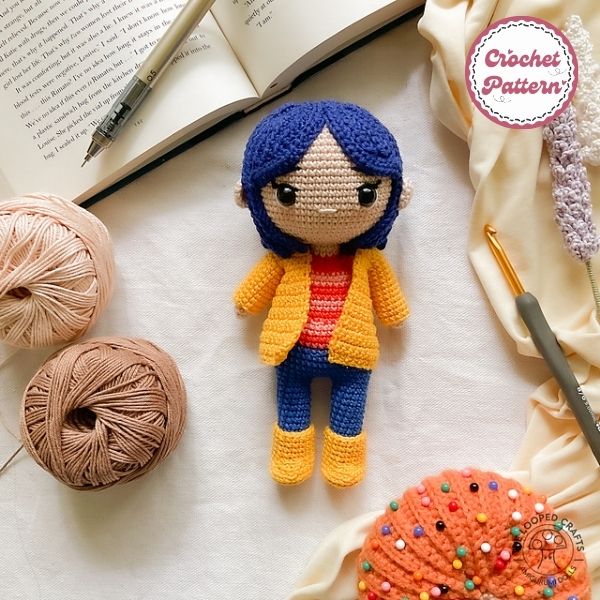
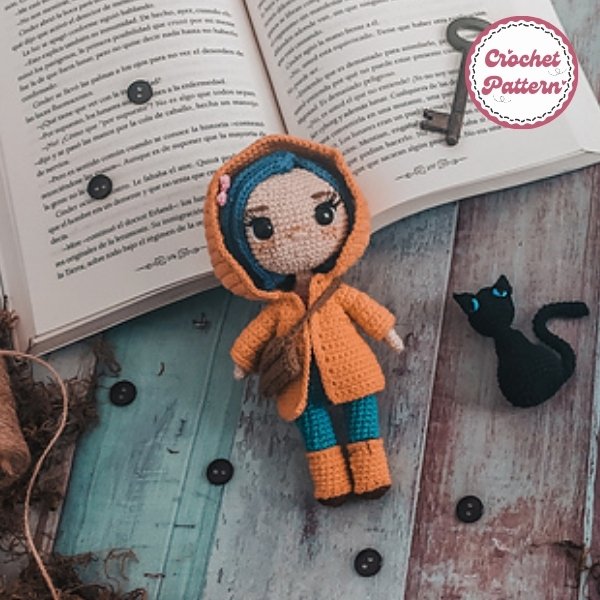
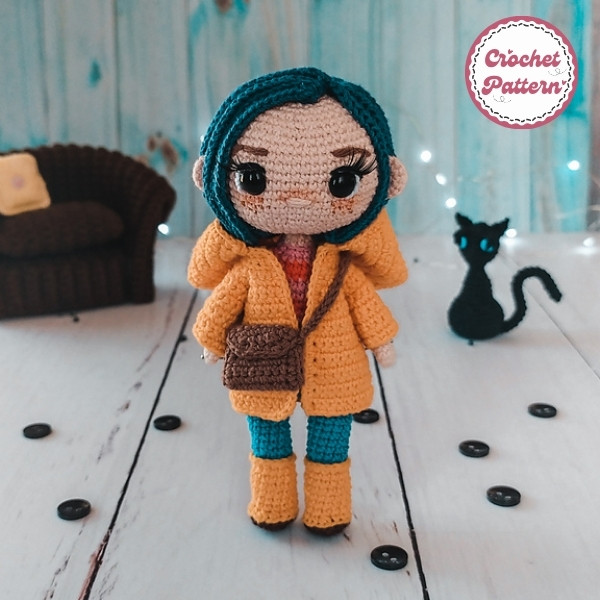
Hello my dear friends Fanycrafts! Today we are going to share with you a new lovely crochet pattern, Coraline Crochet Pattern. In this article, you can find all the step by step details in the pattern description. Overall, this is a very realistic doll. It really reminds me a little of Japanese cartoon characters.
How to create Coraline Crochet Pattern

Creating a Coraline Crochet Pattern doll is a fun project that brings to life the iconic character from Neil Gaiman’s story. Coraline is memorable for her adventurous spirit, unique personality, and quirky sense of style. Crafting a Coraline doll lets you showcase these traits and practice your crocheting skills, with each detail helping to build her character.
Materials Need of Coraline Crochet Pattern
Getting the right tools and materials is the first step to success. Choosing the right yarn is essential. Opt for soft acrylic yarn or cotton blend for a smooth finish and durability. Coraline’s skin tone, clothing, and hair will require several colors, so make sure to select hues that closely match her iconic look.
A small crochet hook, typically between 2.5 mm and 3.5 mm, works best for intricate details in amigurumi dolls. Adjust the size depending on your yarn thickness to ensure the stitches are tight enough to keep the stuffing inside.
Scissors, tapestry needles, and stitch markers are essential for this project. These small tools help manage yarn ends, secure stitches, and ensure the different parts of the Coraline doll are well-organized.
Coraline’s skin tone is usually a soft, pale shade. For her hair, deep blue or black yarn captures her adventurous look, giving the doll a playful edge.
Coraline’s iconic yellow raincoat and blue jeans define her look. Yellow yarn for the coat, blue for her pants, and black for her boots are a must.
Basic Stiches
Single crochet, slip stitch, and increase and decrease techniques form the foundation of this doll. Familiarize yourself with these stitches to create an even, consistent pattern.
Amigurumi is a Japanese technique for crocheting small, stuffed animals and characters. Working in continuous rounds is critical here, as it ensures smooth shapes and prevents unsightly seams.
Abbreviations:
- MR: Magic Ring
- Ch: Chain
- st: Stitch
- SK: Skip stitches
- R: Round
- SC: Single crochet
- HDC: Half double crochet
- SL: Slip stitch
- INC: Increase of sinlge crochet
- INC2. Double increase of SC (3 sc in the same st)
- DEC: Decrease of single crochet
- DEC2 Double decrease of sc (close 3 st into one)
- BLO: Back loop only
- FLO: Front loop only
See more crochet: Clown Fish Crochet Pattern
Chart Instructions Coraline Crochet Pattern

Arms:
- Start with skin color
- R1: MR 6SC (6)
- R2: (2SC, INC) x2 (8)
- R3-4: 8SC (2 rounds) (8), change to pink
- R5: BLO (3SC, INC) x2 (10)
- R6: 10SC (10), change to orange
- R7-8: 10SC (2 rounds) (10), change to pink
- R9-10: 10SC (2rounds) (10), change to orange
- R11-12: 10SC (2 rounds) (10), change to pink
- R13-14: 10SC (2 rounds) (10), change to orange
- R15-16: 10SC (2rounds) (10)
- Fasten of. Insert wire or pipe cleaner inside the arms if you want so.
Leg (4)
- Start with dark brown
- R1: MR 6SC (6)
- R2: 6INC (12)
- R3: (1SC, INC) x6 (18), change to yellow
- R3.5: BLO 18SL (18) (does not count as a R)
- R4: BLO 6SC, 3DEC, 6SC (15)
- R5-10: 15SC (6 rounds) (15)
- R11: FLO 15DC (15), cut the yellow yarn.
- With indigo blue, join yarn to the 1. st of the back loops of round 10 and make 15SC, now make:
- R12: (3SC, DEC)x3 (12)
- R13–18: 12SC (6 rounds) (12)
Fasten off just one leg. When you finish the second one, don’t cut the yarn, then Ch 3 y join to the other leg with SL. In the same st make 1SC (this will be the begining of every R). Now make the body (do not cut the yarn)
Body:
- R19: 11SC on one leg, 3SC on chains, 12SC on the other leg y 3SC on chains. (30)
- R20: (4SC, INC)x6 (36)
- R21: 6SC, INC, 178C, INC, 11SC (38)
- R22 – 24: 38SC (3 rounds) (38)
- R25: 6SC, DEC, 17SC, DEC, 11SC (36)
- R26: (4SC, DEC)x6 (30)
- R27: 30SC (30)
- R28: (4SC, DEC)x5 (25), change to pink
- R28.5: BLO 25 SL (25) (doesn’t count as a R)
- R29 – 30: 25 SC (2 rounds) (25), change to orange
- R31: (3 SC, DEC)x5 (20)
- R32: 20SC (20), change to pink
- R33 – 34: 20SC (2 rounds) (20), change to orange
- R35: (3SC, DEC)x4 (16)
- R36: 16SC (16)
- R37: Join the arms: flat each arm so the top of it is flatten and make: 3SC on body, 2SC joining one arm, skip 1st on the arm and make 2SC joining the arm, 5SC on the body, 2SC joining one arm, skip 1 st on the arm and make 2SC joining the arm (16)
- R38: (2SC, DEC)x4 (12), change to skin color
- R39: BLO (4SC, DEC)x2 (1O)
- R40: 10SC (1O)
- R41: (3SC, DEC)X2 (8)
Head:
- R1: FLO 8INC (16)
- R2: (1SC, INC)X8 (24)
- R3: (2SC, INC)X8 (32)
- R4: (3SC, INC)X8 (40)
- R5: (4SC, INC)X8 (48)
- R6: (7SC, INC)X6 (54)
- R7: (8SC, INC)X6 (60)
- R8 -17: 60SC (10 rounds) (60)
- R18: (8SC, DEC)X6 (54), Insert the safety eyes between 13 and with 10 sts spacing.
- R19: (7SC, DEC)X6 (48)
- R20: (6SC, DEC)X6 (42)
- R21: (5SC, DEC)X6 (36)
- R22: (4SC, DEC)X6 (30)
- R23: (3SC, DEC)X6 (24)
- R24: (2SC, DEC)X6 (18)
- R25: (1SC, DEC)X6 (12)
- R26: 6DEC (6)
- Fasten off
Hair:
- Start with dark blue
- R1: MR 8SC (8)
- R2: 8INC (16)
- R3: (1SC, INC)X8 (24)
- R4: (2SC, INC)X8 (32)
- Now make the strands:
- Strand from I to 22: 26Ch, 1SC, 24HDC (25)
- Strand from 23 to 25: 32Ch, 1SC, 30HDC (31)
- Fasten off. Leave the remaining 7 stitches unworked. Sew the hair to the head, placing the longer strands next to the head.
Ears:
- R1: MR 5SC (5)
- R2: 5INC (10)
- Fasten off and sew the ears at each side of the head
Coat:
- Start with yellow
- R1: 25Ch, 245C (24)
- R2: 24SC (24)
- R3: INC, 2SC, 6C, SK6, INC, 4SC, INC, 6C, SK6, 2SC, INC (28)
- R4: 4SC, 6SC on chains, 8SC, 6SC o chains, 4SC (28)
- R5: 3SC, (INC, 6SC)x3, INC, 3SC (32)
- R6 – 7: 32SC (2 rounds) (32)
- R8: INC, 10SC, INC, 8SC, INC, 10SC, INC (36)
- R9 -11: 36SC (3 rounds) (36)
- R12: 8SC, INC, 5SC, INC, 6SC, INC, 5SC INC, 8SC (40)
- R13 -19: 40SC (7 rounds) (40)
- R20: 39SC, INC2, turn and make at the sides: 18SC, INC2, 2SC (place a st marker in the st that you just made), 20SC, INC2, 18SC, INC.
- Fasten off
Sleeves:
- Join yellow yarn to the unworked stitches of round 3 and make:
- R1-4: 14SC (4 rounds) (14)
- R5: (6SC, INC) x2 (16)
- R6-11: 16SC (6 rounds) (16)
- Fasten off
Hood (The yarn in the stitch where you placed Tie st marker and make:
- R1: (1SC, INC)x10 (30)
- R2: 30SC (30)
- R3: (2SC, INC)x10 (40)
- R4 – 5: 40SC (2 rounds) (40)
- R6: (3SC, INC)x10 (50)
- R7 – 21: 50SC (15 rounds) (50)
- Fasten off
Join yarn in the 17th st of R 21 and make:
- R1: 18SC (18)
- R2: INC, 16SC, INC (20)
- R3 – 4: 20SC (2 rounds) (20)
- R5: INC, 18SC, INC (22)
- R6 -15: 22SC (10 rounds) (22)
- Make SC all around the hood.
Bag:
- Start with light brown
- R1: 9Ch, 8SC (8)
- R2 -14: 8SC (13 rounds) (8)
- R15: DEC2, 2SC, DEC2 (4)
- Do not turn your work, make SC all around the rectangle done, in every corner make INC2, then fasten off and leave a long tail. Fold the rectange to a third, making this way the bag shape, sew on every side and so the lapel as well and fasten off. Join yarn on one side of the bag and make as many Ch as you want the long of the bag handle, and then join with SL to the other side. Fasten off
Firefly:
- Start with blue
- Chain 9, and begining from the 2nd Ch from your hook, make: 2SL, 2SC, 2HDC, 2DC (8).
- Fasten off and leave a long tail. With pink color yarn, join to the base chain and Ch 5, then from the 21 chain from your hook, make 4HDC and join with SL to the next available st of the base chains (the ones in blue). Then chain 4 and make 3HDC. Fasten off. Repeat this on the other side, but begining from the 3rd ST.
- Fasten off. Glue or sew the firefly to Coraline’s hair.
Conclusion
Creating a Coraline crochet doll is both challenging and rewarding. Each part of the process brings her unique character to life, from her facial details to her iconic raincoat. With careful attention to detail and a little patience, you’ll create a Coraline doll that’s not only adorable but also reflects her adventurous spirit. Give it a try, and let your creativity shine!

