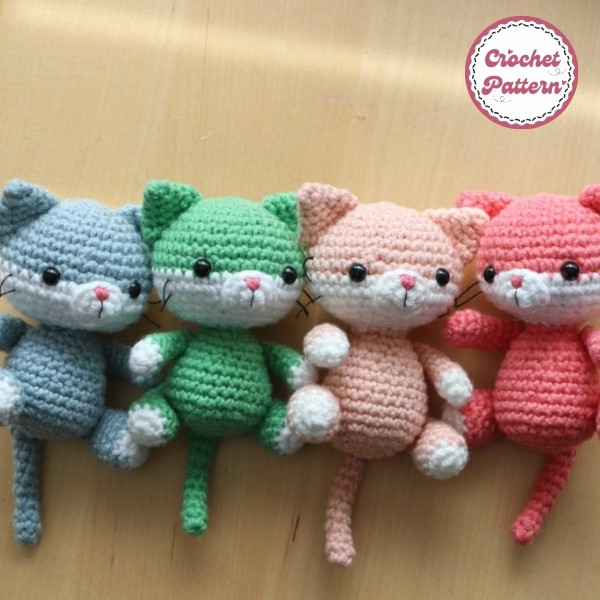
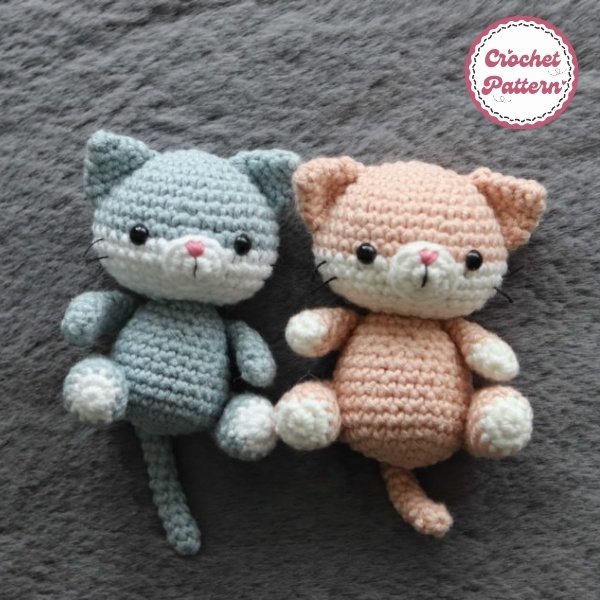
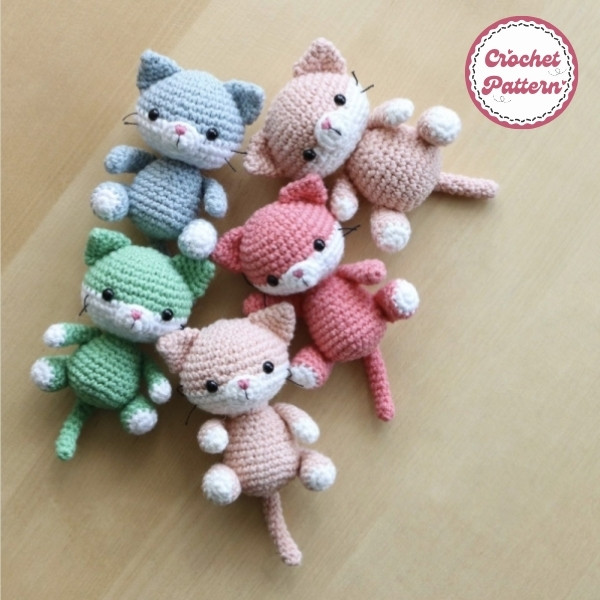
Crocheting a tiny kitty can be a delightful project, especially for beginners or those looking to make a cute, handmade gift. Not only is this a fun activity, but you’ll also end up with an adorable little kitty that can be used as a keychain, desk companion, or even a gift for a friend. Let’s walk through the process of creating your very own tiny kitty crochet pattern.
How to create Tiny Kitty Crochet Pattern

This tiny kitty pattern is crocheted in continuous rounds, making it a great project for beginners with basic crochet skills. While its tiny size may pose a bit of a challenge, the techniques involved are straightforward and easy to learn.
Who doesn’t love cute, handmade crochet animals? If you’re a crochet enthusiast or just getting started, making a tiny kitty can be a rewarding and fun experience. It’s a great way to sharpen your skills, and in the end, you get a charming little companion. In this guide, Fanycrafts will walk through every step to create a tiny kitty crochet pattern that even beginners can follow. Ready to get started?
Before diving into your crochet project, you’ll need to gather the following materials:
- Yarn: Choose a soft yarn, typically in gray, white, or black, to mimic a kitty’s fur. Cotton or acrylic yarns work best.
- Hook Size: A 2.5mm to 3.5mm hook works perfectly for tiny crochet projects like this.
- Stuffing: Polyester fiberfill or cotton for stuffing the kitty.
- Additional Items: Safety eyes or embroidery thread for the face, a tapestry needle for sewing, and scissors.
- 6mm black safety eyes
- fiber fill
- yarn needle
- sewing needle
- main color yarn (Category 2)
- white yarn
- embroidery thread (nose color)
- black thread (whiskers)
If you’re new to crochet, learning a few key stitches is essential. Here’s a quick guide to some stitches you’ll need:
- Chain Stitch (ch): This is the foundation of many crochet patterns. To make it, simply yarn over (YO) and pull through the loop on the hook.
- Single Crochet (sc): Insert your hook into the stitch, YO, pull through the stitch, YO again, and pull through both loops.
- Magic Circle (mc): This is a great way to start circular crochet projects. It allows you to tighten the first round completely, avoiding gaps.
You will not need more than one skein of any color to make this doll.
Explore more crochet: Free Lovely Eggplant Crochet Pattern
Chart Instructions Tiny Kitty Crochet Pattern

Head (start with main color yarn):
- R1: make 6sc into magic ring
- R2: inc in each st [12]
- R3: (sc in next st, inc in next st) repeat 6 times [18]
- R4: sc in all 18 st [18]
- R5: (sc in next 2 st, inc in next st) repeat 6 times [24]
- R6: (sc in next 3 st, inc in next st) repeat 6 times [30]
- R7: sc in all 30 st [30]
- R8: sc in next 2 st, inc in next st (sc in next 4 st, inc in next st) repeat 5 times, sc in next 2 st [36]
- R9-10: sc in all 36 st
- change to white yarn
- R11: sl st, sc in next 35 st [36]
- R12: sc in all 36 st
- R13: sc in next 2 st, dec (sc in next 4 st, dec) repeat 5 times, sc in next 2 st [30]
- R14: (sc in next 3 st, dec) repeat 6 times [24]
- R15: sc in all 24 st [24]
- Place the eyes, attach the snout, and sew whiskers before continuing
- R16: (sc in next 2 st, dec) repeat 6 times [18]
- R17: (sc in next st, dec) repeat 6 times [12]
- Fasten off
- Stuff the head with fiber fill. In my example, the safety eyes are placed between Rnds 10 and 11, with an interspace of 6 stitches.
Ear (use main color yarn):
- R1: make 4sc into magic ring
- R2: (sc in next st, inc in next st) repeat twice [6]
- R3: (sc in next st, inc in next st) repeat 3 times [9]
- R4: (sc in next 2 st, inc in next st) repeat 3 times [12]
- R5: (sc in next 3 st, inc in next st) repeat 3 times [15]
- Fasten off and leave a tail of about 10 inches long. Flatten the ear and sew the opening shut with the yarn end. The remainder of the yarn tail should be used to sew the ear onto the head.
Snout (use white yarn):
- R1: make 6sc into magic ring
- R2: inc in each st [12]
- Fasten off with an invisible finish and leave a tail for sewing onto head.
- To make the nose, use your yarn needle and embroidery floss and sew a “V” onto the snout as pictured. In my example, I repeated these stitches 3 times each. Tie the ends behind the snout.
Body:
- R1: make 6sc into magic ring
- R2: inc in each st [12]
- R3: (sc in next st, inc in next st) repeat 6 times [18]
- R4: (sc in next 2 st, inc in next st) repeat 6 times [24]
- R5: (sc in next 3 st, inc in next st) repeat 6 times [30]
- R6-7: sc in all 30 st [30]
- R8: (sc in next 3 st, dec) repeat 6 times [24]
- R9-10: sc in all 24 st [24]
- R11: (sc in next 2 st, dec) repeat 6 times [18]
- R12-13: sc in all 18 st [18]
- Stuff the body with fiber fill
- R14: (sc in next st, dec) repeat 6 times [12]
- Fasten off and leave a tail for sewing to head.
Arm (make two, start with white yarn if you’d like your doll to have white paws):
- R1: make 6sc into magic ring
- R2: (sc in next st, inc in next st) repeat 3 times [9]
- Change to main color yarn
- R3: sl st, sc in next 8 st [9]
- R4: dec, sc in next 7 st [8]
- R5: sc in all 8 st [8]
- R6: dec, sc in next 6 st [7]
- R7: sc in all 7 st [7]
- R8: dec, sc in next 5 st [6]
- Fasten off and leave a tail for sewing to body. Do not stuff the arm. Sew the opening shut before attaching to the body.
Foot: (make two, start with white yarn)
- R1: make 6sc into magic ring
- R2: inc in each st [12]
- Change to main color yarn
- R3-4: sc in all 12 st [12]
- R5: dec, sc in next 10 st [11]
- Stuff with a bit of fiber fill
- R6: sc in all 11 st [11]
- R7: dec, sc in next 9 st [10]
- R8: dec, sc in next 8 st [9]
- R9: sc in all 9 st [9]
- Fasten off and leave a tail for sewing to body. Sew the opening shut before attaching to the body.
Tail:
- R1: make 5sc into magic ring
- R2-11: sc in all 5 st [5]
- No stuffing is needed
- Bind off and leave a tail for sewing onto body
This versatile pattern can be adapted to create a variety of adorable animals. As an example, I’ve used it to make these charming bunnies. Feel free to personalize your dolls according to your preferences. You could experiment with different head colors or omit the white paws for a unique look. These little creations would make delightful ornaments or keychains. The possibilities are endless! This foundational pattern offers a great starting point for crafting a wide range of animal companions.
Enjoy your crochet project! In addition, you can refer to many other crochet patterns from Fanycrafts at the All Crochet Patterns blog.
Conclusion
Creating a tiny kitty crochet pattern is a fun and engaging project for all skill levels. With a few materials and basic crochet knowledge, you can craft an adorable little kitty that’s perfect as a gift or a personal keepsake. Follow these steps, and soon enough, you’ll have your own handmade kitty to show off!

