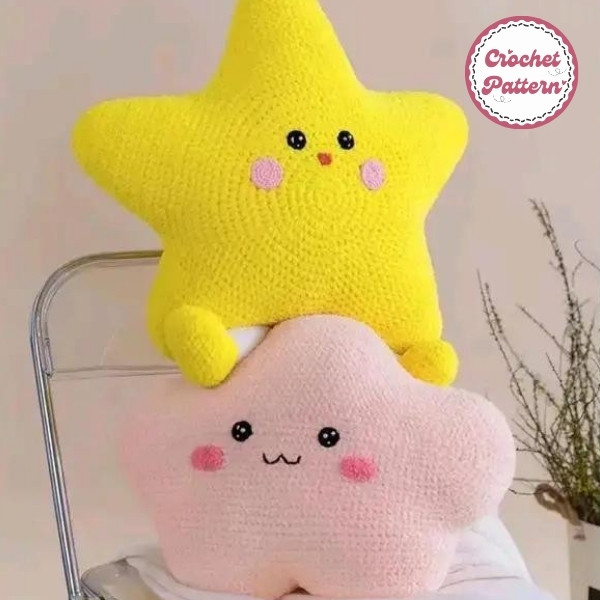
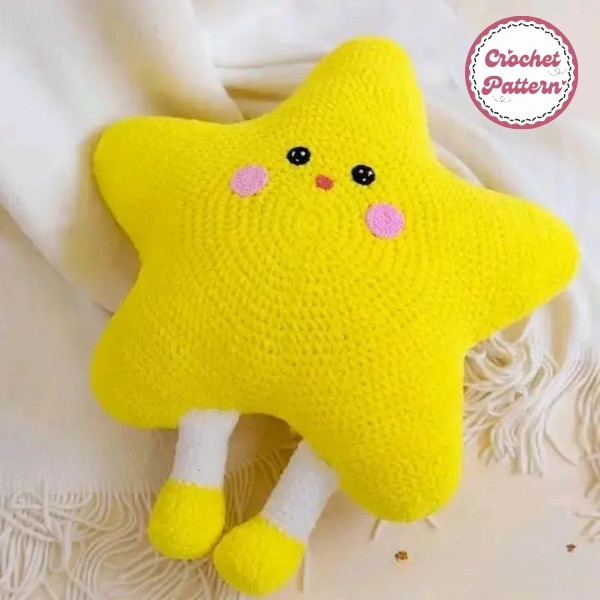
Crocheting has become a popular hobby for crafters of all skill levels, especially when it comes to designing small, beautiful patterns like stars. Whether you’re looking to make a decoration, an embellishment, or even a keychain, the pretty star crochet pattern is a versatile project that can be used in a variety of ways. In this article, Fanycrafts will walk you through how to create a pretty star crochet pattern step by step, even if you’re a beginner!
Introduction about Pretty Star Crochet Pattern

Crocheting is an art form that allows you to create something beautiful and functional with just yarn and a hook. The star crochet pattern is one of the most charming and versatile designs. Whether you’re aiming to create Christmas ornaments, keychains, or colorful bunting for a party, stars are perfect little projects. This guide will teach you how to crochet a pretty star from scratch and give you all the tips and tricks you need to make it stand out.
Crochet stars are not just aesthetically pleasing, they’re incredibly versatile. You can attach them to almost anything, from baby blankets to beanies. These stars can also be used as ornaments during the holidays or as a unique handmade gift. Their simplicity combined with their stunning shape makes them a go-to project for crocheters of all levels.
How to create Pretty Star Crochet Pattern
The best yarn for a pretty star pattern depends on your intended use. For decorations or keychains, a worsted weight yarn works great. If you’re aiming for something more delicate, opt for finer cotton yarn.
For most crochet stars, a 3.5mm to 4.5mm crochet hook is ideal. This size works well with worsted weight yarn to create neat, well-defined stitches.
To add some sparkle, you can incorporate beads into your star design. Attach buttons, sequins, or even little charms to customize your crochet star.
Before Fanycrafts dive into the pattern, let’s establish some fundamental crochet terms and stitches:
- Chain (ch): The foundation stitch, created by pulling the yarn through the loop on your hook.
- Single crochet (sc): The simplest stitch, inserting the hook into the next stitch, pulling up a loop, and then pulling through both loops on your hook.
- Half double crochet (hdc): A slightly taller stitch than the sc, involving two yarn overs and two pulls through loops.
- Double crochet (dc): A taller stitch than the hdc, involving three yarn overs and three pulls through loops.
- Slip stitch (sl st): A very small stitch used to join or turn.
The classic five-point star consists of a circular base with evenly spaced points. The number of stitches you make determines how tall and sharp the points are.
Careful stitch counting is essential for keeping your star symmetrical. Each point of the star needs to have the same number of stitches for a balanced look.
Explore more crochet pattern: Big Capybara Crochet Pattern
Chart Instructions Pretty Star Crochet Pattern
Body:
- R1: MR 8x
- R2: 8v
- R3: 8(x, v)
- R4: 8(x, v, x)
- R5: 8(3x, v)
- R6: 8(2x, v, 2x)
- R7: 8(5x, v)
- R8: 8(3x, v, 3x)
- R9: 8(7x, v)
- R10: 8(4x, v, 4x)
- R11: 8(9x, v)
- R12: 8(5x, v, 5x)
- R13: 8(11x, v)
- R14: 8(6x, v, 6x)
- R15: 8(13x, v)
- R16: 8(7x, v, 7x)
- R17: 8(15x, v)
- R18: 8(8x, v, 8x)
- R19: 8(17x, v)
Wing:
- There are 5 wings, each wing has 28 stitches, 3 wings are 2 stitches apart, the remaining 2 wings (2 lower wings) are 4 stitches apart.
- R1: TA, 24x, TA
- R2: TA, 22x, TA
- R3: 24x
- R4: A, 20x, A
- R5: 22x
- R6: A, 18x, A
- R7: 20x
- R8: A, 16x, A
- R9: 18x
- R10: A, 14x, A
- R11: 16x
- R12: A, 12x, A
- R13: 14x
- R14: A, 10x, A
- R15: 2A, 4x, 2A
- R16: 4A
Legs x2:
- R1: 11CH, K, 9x, W, 8x, v
- R2: v, 8x, 3v, 8x, 2v
- R3: x, v, 8x, 3(T, TV), 8x, 2(x, v)
- R4: 2x, v, 7x, T, 3(T, TV, T), T, 7x, 2(2x, v)
- R5: 4x, 8x, 3(T, TA, T), 8x, 8x
- R6: A, 2x, 6x, TA, 9T, TA, 6x, 4x, 2A
- R7: 3x, 5a, TA, 2FA, F, 2FA, TA, 5x, 6x
- R8: A, 5x, TA, FA, F, FA, TA, 6x, 2A
- R9: 6x, 3a, 7x
- R10-21: White 16x
Eyes x2:
- R1: 6x
- R2: 6v
Mouth: 4CH, K, 2x, W, X, V
Blush:
- R1: 6x
- R2: 6v
- R3: 6(x, v)
- R4: 6(x, v, x)
Wash your crochet stars gently by hand, especially if they have embellishments. Store them flat to preserve their shape. To ensure your star holds its shape, block it after crocheting. Pin it to a foam board and spray it lightly with water. Let it dry in place.
By following these guidelines and experimenting with different techniques, you can create beautiful and unique star crochet patterns. Enjoy your crochet project! In addition, you can refer to many other crochet patterns from Fanycrafts at the All Crochet Patterns blog.
Conclusion
Creating a pretty star crochet pattern is a rewarding and fun project that allows for endless customization. Whether you’re a beginner or an experienced crocheter, you can enjoy crafting these stars and turning them into something special. With just a bit of yarn and creativity, you can make stars that shine in your home or as gifts.

