Looking for a stylish accessory to add to your wardrobe? A small floral headscarf crochet pattern might be just what you need! Crochet is not only a fun and relaxing hobby but also a fantastic way to create unique and personalized fashion items. In this guide, we’ll walk you through creating a beautiful floral headscarf step-by-step.
How to create Small Floral Headscarf Crochet Pattern

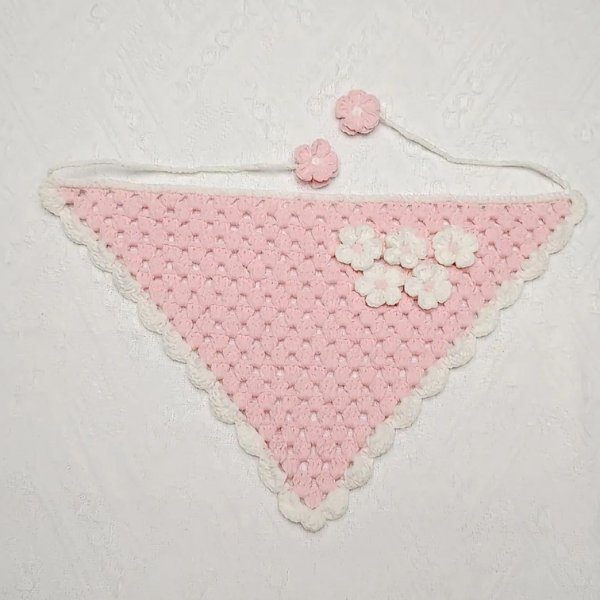
Very happy to share with you how to create a cute and adorable Small Floral Headscarf Crochet Pattern. Fanycrafts hopes, you will like it and if you find it interesting, please share this article with your friends because it means a lot to us.
Cotton or a cotton-blend yarn is ideal for a lightweight and comfortable headscarf. The time varies depending on your skill level and the complexity of the pattern, but typically it takes around 4-6 hours.
Materials Needed
Before we dive into the crocheting, let’s gather all the materials you’ll need.
- Yarn Selection: Choose a lightweight yarn for your headscarf. Cotton or a cotton-blend yarn is ideal as it’s soft and comfortable to wear. Pick colors that match or complement each other for the base and the flowers.
- Crochet Hooks: A 3.5mm to 4mm crochet hook works well for this project. Ensure your hook size matches your yarn for the best results.
- Additional Supplies: You’ll also need a yarn needle for weaving in ends, a pair of scissors, and stitch markers to keep track of your rows.
- Tapestry needle
- Scissors
Stitches Used
Familiarizing yourself with the basic stitches will make the process smoother.
- Chain Stitch (ch): The foundation of most crochet projects. Simply yarn over and pull through the loop on your hook.
- Single Crochet (sc): Insert your hook into the stitch, yarn over, pull through, yarn over again, and pull through both loops on your hook.
- Double Crochet (dc): Yarn over, insert your hook into the stitch, yarn over and pull through, yarn over and pull through two loops, yarn over and pull through the remaining two loops.
- Slip Stitch (sl st): Insert your hook into the stitch, yarn over, and pull through both the stitch and the loop on your hook.
Tips:
- Use contrasting colors for the flowers and leaves to create a vibrant look.
- Experiment with different flower sizes and arrangements to create unique designs.
- Consider adding beads or sequins to the flowers for extra embellishment.
Remember: This is a basic pattern. You can customize it to your liking and skill level. Crochet is a wonderful way to express your creativity!
Explore more crochet pattern: Fluffy Rabbit Crochet Pattern
Chart Instructions
Body:
- R1: Starting with 6CH, hook into first stitch (3F, E)
- R2: Start 5CH, flip the piece of fabric, hook into the first large hole (3F, CH), hook into the second largest hole (3F, E)
- R3: Start 5CH, turn the fabric over, hook the first and second largest holes (3F, CH), hook into the third largest hole (3F, E)
- R4: Start 5CH, lay out a piece of fabric, hook into the first, second, third largest hole (3F, CH), hook into the fourth largest hole (3F, E)
- Rule summary: hook (3F, CH) into each large hole, hook (3F, E) into the last large hole, then hook up 5CH, flip the piece of fabric and hook again
Lace: Place X in one hole, 7F in another hole, loop and knit a row of Xs along the horizontal edge.
Flower:
- R1: Ring up 5x
- R2: (3CH, 3F, 3CH, SL), Repeat 5 times.
Would you like to add any specific details to your headscarf, such as a preferred flower type or color scheme?
Enjoy your crochet project! In addition, you can refer to many other crochet patterns from Fanycrafts at the All Crochet Patterns blog.
Conclusion
Creating a small floral headscarf crochet pattern is a rewarding project that allows you to express your creativity and style. With this guide, you’ll have a beautiful, handmade accessory to cherish or gift. Happy crocheting!