You want to own a funny and adorable pig but don’t have the conditions or for many different reasons. Don’t worry because now we will suggest you a way to create a Flying Pig Crochet Pattern. In this article, Fanycrafts will show you how to make the Flying Pig Crochet Pattern in the most detailed and easy-to-understand way. Ready to get started?
Flying Pig Crochet Pattern
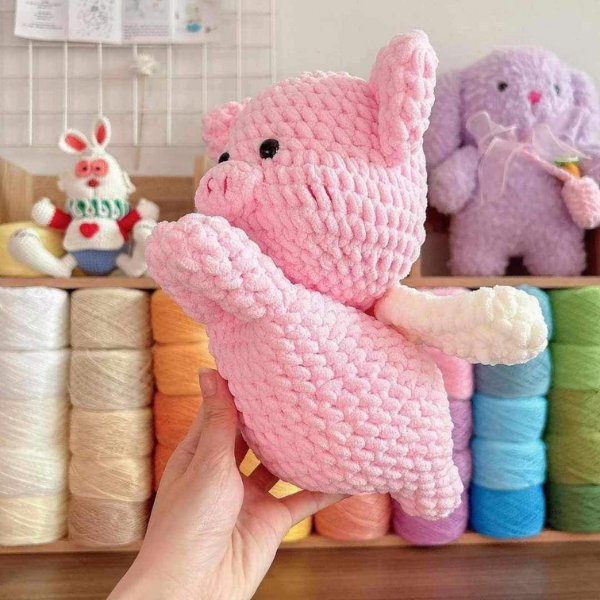
Have you ever thought about making a whimsical Flying Pig out of yarn? Crocheting is a fantastic way to bring such imaginative ideas to life! Whether you’re a seasoned crafter or a beginner looking for a fun project, a Flying Pig crochet pattern is perfect for honing your skills and creating something adorable.
Materials
Before you start, let’s gather all the materials you’ll need. Choosing the right supplies is crucial for the success of your project.
- Pink yarn (worsted weight recommended)
- Small amount of black yarn (for eyes)
- Crochet hook (size depends on yarn weight, check yarn label for recommendation)
- Fiberfill stuffing
- Yarn needle
- Scissors
- Optional: light pink yarn for inner ears (blush effect)
Stitches
If you’re new to crochet, you’ll need to familiarize yourself with some basic stitches. Here are the essential ones for this project:
- Single crochet (sc)
- Increase (inc) – typically two single crochets in one stitch
- Decrease (dec) – typically crocheting two stitches together
- Magic ring (mr) – creates a circle without a hole in the center (look up video tutorial for reference if needed)
See more crochet pattern: Cat Wearing Hat Crochet Pattern
How to create Flying Pig Crochet Pattern
This pattern will guide you through crocheting a delightful flying pig amigurumi. Feel free to adjust colors, yarn weight, and hook size to create your perfect pig!
Head:
- R1: MR 6x
- R2: 6v
- R3: 6(x, v)
- R4: 6(2x, v)
- R5: 6(3x, v)
- R6: 6(4x, v)
- R7-10: 36x
- R11: 10x, 5v, 6x, 5v, 10x
- R12-14: 46x
- R15: 10x, 5a, 6x, 5a, 10x
- R16: 36x
- R17: 6(4x, a)
- R18: 6(3x, a)
- R19: 6(2x, a)
- R20: 6(x, a)
- R21: 6a
Ears x2:
- R1: MR 6x
- R2: 3(x, v)
- R3: 3(x, v, x)
- R4: 3(3x, v)
- R5: 3(4x, a)
Wing:
- R1: 9ch, turn, 7w, 5x, pull next st
- R2: 1ch, [FLO] 3x, 5x, 3v, 7x
- R3: 3ch, [BLO] 3x, 10x, 3(v, x), 2x, slst
- The other wing is opposite the base wing, BLO hook first, FLO hook after
Tail: 9ch, turn, 7slst
Front leg:
- R1: MR 8x
- R2-3: 8x
- R4-6: 8x
Back leg (x2):
- R1: MR 6x
- R2: 3(x, v)
- R3-4: 9x
- Go up 3ch and connect the pins
- R5: 9x, 3x, 9x, 3x
- R6: 6(3x, v)
- R7: 6(4x, v)
- R8: 2v, 10x, 4(x, v), 7x, 4v, 3x, 2v
- R9: 41x, m, 4x
- R10: 46x
- R11: 2a, 29x, 4a, x, 2a
- R12: 34x, m, x
- R13: 6(4x, a)
- R14: 30x
- R15: 6(3x, a)
- R16-20: 24x
To finish crocheting, you need to weave in any remaining yarn ends and make sure all parts are securely attached. This pattern is a great base to customize! Feel free to get creative and add your own personal touch to your flying pig crochet pattern.
Enjoy your crochet project! In addition, you can refer to many other crochet patterns from Fanycrafts at the All Crochet Patterns blog.